I've been experimenting lately with lacto fermentation as a way to preserve and create good, healthy, and tasty food from our own surplus produce. The modern way to make pickles and preserve food is to use lots of vinegar or sugar and pasteurize or boil the heck out of it to sterilise the food by destroying any bad bacteria but the problem with this is all the good bacteria and nutrients are killed also.
To stay healthy and ward off disease and illness we need to ingest good bacteria because these guys play a huge role (mostly in our intestines where they live) in fighting baddies. If we don't eat a good diet or are required to take a course of antibiotics, our good bacteria get decimated so we need to build them up again and the best way to do this is through eating food with good bacteria in it.
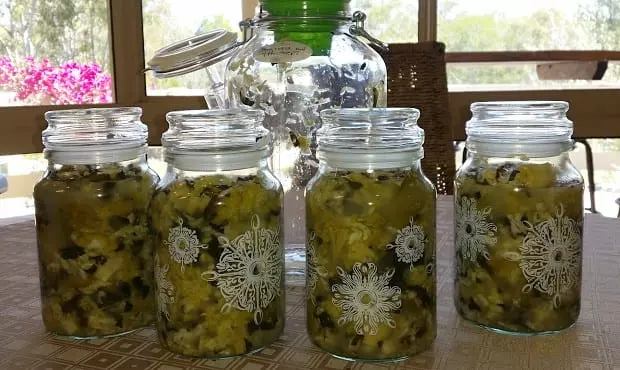
Lacto fermented mixed vegetables (image above)
Eating lacto fermented foods is a great way to absorb good bacteria into our system and lacto fermentation is a classic example of good bacteria vs bad bacteria. When lacto fermentation is used as a way to make or preserve delicious food (such as real pickled cucumbers done the old way) we create an environment which actually favours good bacteria and when these good bacteria are allowed to grow in huge numbers they overpower all the bad bacteria and make it impossible for them to grow.
The same principle of growing good bacteria in a vessel can be applied to our stomach. That is, if we eat more food high in fibre and also food laced with good bacteria we create an environment in our gut which favours good bacteria and this aids in better health!
The health benefits of good bacteria like lactobacillus (derived from the lactic acid bacteria group) are only just being discovered definitively now. There’s no doubt scientists, medical practitioners, and nutritionists, have known the benefits of good bacteria for decades but until recently there hasn’t been a lot of research or studies done to prove the benefits or find out what these “good bacteria” are actually doing in/to our body to keep us healthy.
Medical research into the benefits of good gut bacteria and lacto fermented food is gathering pace fast! Anecdotal evidence is showing some amazing connections linking good stomach bacteria to a healthy immune system, a cure to asthma, prevention of many cancers, helping IBS, curbing obesity, assisting mental health, and much more…
Fancy stomach bacteria linked to mental health and obesity – is it possible a tiny organism in our gut can alter the way we think? Medical researchers are saying yes and have proved links to curbing obesity in mice by feeding them good gut bacteria. In other words, eating the right foods to feed our good gut bacteria or eating foods high in good gut bacteria (like lacto fermented foods) could help with weight loss or to keep the weight off! 
There are many diverse ways to make lacto fermented foods and the techniques vary from a simple pot and plate as a lid to a proper fermenting kit you get from a professional brewing shop. Some people and cultures still ferment their produce in the ground or in hollowed out gourds!
Europeans enjoy using their expensive fermenting crock pots (ceramic vessels with a water moat on top) and many English speaking countries are now using glassware with simple airlocks like Fido bottles or even without airlocks such as Weck jars. OzFarmer is a good online store to checkout for these jars and bottles.
Indeed, with a little experimentation and ingenuity you can lacto ferment all kinds of food in all types of vessels. Some people use an open container like a ceramic pot with a dinner plate on top as the lid/weight. I’ve made my own lacto fermentation vessel with an airlock out of a reused pickle jar and $3 plastic airlock, which I fitted by drilling a hole in the lid. I decided to make sauerkraut in my DIY vessel for the first time and it worked fantastically! Boy was it yummy!
Lacto fermentation is one of the safest ways to preserve garden produce. Our fear of bacteria has led us down the pathway of food sterilised so much that it’s hardly worth eating. The more I researched the benefits and process of lacto fermentation the more I gravitated towards using it as an easy and safe way to preserve a glut of good fresh produce.
A great book to read about lacto fermentation is The Art Of Fermentation by Sandor Katz (get it from Amazon or Aussies can buy it from eBay here or even on Kindle here) it’s an amazing piece of literature and it sure dispels any myths about the dangers of fermenting food.
One “danger” I was worried about when starting fermentation for the first time was bottles and jars exploding from a build-up of carbon dioxide (a gas produced as a by-product from the fermentation process). I realise now that not only is exploding bottles unlikely but mitigating the risk of pressure building up in a vessel is easy!
Jars like Weck and Fido with the rubber grommet under the lid actually let the carbon dioxide gas escape without requiring the bottles to be “burped” (the lid opened every few days). Some larger jars come with an airlock built into the lid and this lets gas escape without letting oxygen back in, which is what you want – an anaerobic (without oxygen) environment when making lacto fermented goodies.
Once the fermentation process has run its course and you are happy with the taste of the fermented produce the gas build-up by then slows considerably anyway; and if refrigerated, the fermentation process almost stops completely so pressure build up in jars or bottles is not really an issue.
Pretty much any vegetable or fruit can be lacto fermented. The most famous lacto fermented food I knew about before getting into lacto fermentation was sauerkraut but Kimchi from Korea is just as famous in Asia and it was only when I started Googling and looking for more recipes that I appreciated how big lacto fermentation is and how widespread the art of fermentation was across the globe.
It seems like the whole human race is fed in one way or another through lacto fermentation and I guess this is why we humans are a host to thousands of types of lacto fermentation bacteria and probably why we have evolved needing these organisms to live in and on us to stay healthy.
How to make a mixed vegetable lacto ferment (recipe)
The following recipe is nothing special to make and mostly common-sense; nevertheless, the end product is rather amazing and gourmet. This mixed vegetable ferment is wonderful on a piece of fresh bread on top of some cream cheese or served as a side with all meats – it can also be added to stews or casseroles to give a slight zing to any dish.
Many people assume sauerkraut (fermented cabbage) is the best and main lacto fermenting way to go but fermenting different vegetable mixes can produce fantastic taste sensations and this is one of those recipes everyone should try!

Lacto fermented vegetables on toast with ham and cream cheese (image above)
I often eat our fermented vegetable mix straight out of the fridge on its own like you would usually eat a pickled cucumber and I find the taste a real sensation that makes me salivate just writing about it now.
Personally, the most important vegetable/herb in this simple fermented vegetable mix is the fennel. Fennel gives the whole mix a subtle aniseed tinge, which enhances all the ingredients and brings a freshness to the ferment.
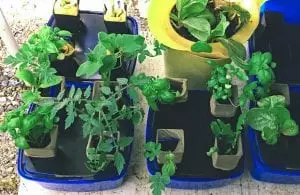
All the vegetables I used in my mixed vegetable lacto ferment were collected from my own organic garden and I recommend this for two reasons:
- It makes sense to grow the produce yourself because this saves money and there’s nothing like your own fresh produce.
- You know what is on and in your produce. Commercial produce could be contaminated with chemicals and this is not only unhealthy but it can inhibit the natural growth of good bacteria during the fermentation process.
You can substitute or omit any vegetables in my recipe with your own and I encourage you to experiment! Herbs and spices can be used to enhance flavour for instance adding dry or fresh chillies can really give some punch where needed. Having said that, the mixed vegetables in this lacto fermentation really work well together and I recommend giving them a try.
If your vegetables are clean and organic then don’t bother washing them because the natural yeasts and bacteria on the produce will help start the fermentation process. Naturally, if your vegetables are dirty or have been exposed to pesticides/chemicals then wash them.
Equipment you will need:
- Fermenting container/vessel – This can be almost anything as long as it is lead free, food grade, and non-metallic; such as, glass jar, bowl, pot, crock pot, etc. Make sure the container is clean – it doesn’t have to be sterile but sterile is good.
- Weight – A weight of some sort is needed to weigh down the vegetables and keep them under the brine. Glass lids work well, purpose built crock pots have a special stone with a hole in the middle, a wrapped up piece of cabbage leaf stuffed into the neck of a jar can work ok, or if you are using a large container a simple plate with a weight on top is perfect.
- Airlock – You may or may not require an airlock. In this example I did use an airlock because the Fido jar I had was purposely built for an airlock in the top of the lid. However, as I pointed out earlier you can lacto ferment vegetables in a container without an airlock. There are a few different airlocks on the market and they are inexpensive, easy to fit, and effective at letting carbon dioxide escape from the vessel whilst not letting oxygen back in.
- Large bowl or container – This can be anything and it’s really just for working with the vegetables before placing them into the fermenting vessel.
Depending on how much produce is on hand, you can make this lacto ferment of mixed vegetables whatever size you like so I won’t include exact quantities (apart from the brine which is used to fully cover all the vegetables).
Ingredients
- Cauliflower (purple variety) – qty
- Kale – qty
- Snap pea – qty
- Green Bean – qty
- Cabbage – qty
- Fennel – qty
- Salt – qty of natural sea salt or pickling salt
- Water – qty of natural spring water (non-chlorinated or fluoridated because this can affect the growth of lacto bacteria)
Brine – Mix a ratio of 1 x tablespoon of salt with 1 x cup of water (4 x tablespn salt per 1 litre/quart of water) you will need to make enough brine to cover your mixed vegetables. Sando Katz the author of The Art of Fermentation recommends a 5% brine which works out a little less than what I use at 50 grams per litre of water or 3.5 x tablespn salt per 1 litre/quart. See notes at the end of this article.
Method
Step 1 – Vegetable prep
Break up the cauliflower into small florets keep some a little larger but make most bite size. Keep the snap peas whole (unless they are really big) and chop the beans up into segments.
Slice the cabbage and kale nice and thin and slice the fennel bulb thin also and chopped into smallish pieces – there’s no exact science to this…

Chopped vegetables for lacto ferment (image above)
Step 2 – Bruising
Place all the vegetables into a large bowl or open container and bruise them by scrunching them up with your hands or hitting them with the palm of your hand or a blunt instrument like a wooden rolling pin. The bruising helps to break down the cell walls helping the fermentation process. There’s no need to go overboard just a light bashing will do and to be honest you could get away without bruising the vegetables at all – but that’s what I do so I wanted to mention it.
Step 3 – Packing
Pack the mixed vegetables into the fermentation vessel tightly by pushing them down as you go until the vessel is almost full leaving about 3 inches from the top of the lid.
Step 4 – Brining
Pour the brine over the vegetables until they are fully submerged.
Step 5 – Cover
Cover and weigh down the vegetables with what I suggested earlier (under “equipment you will need”) so the vegetables won’t rise up over the brine – this is important because you don’t want the vegetables exposed to air otherwise they will not ferment correctly.
If you find some tiny pieces of chopped vegetables rising past your weight and floating on top of the brine don’t be too concerned. You can skim these pieces off the top if you wish but unless there is lots of floating matter above the weight I wouldn’t worry about it.
At this point, depending on what type of fermentation vessel you are using you would shut the lid and place a little water in the airlock or just cover and weigh down.

Weck glass lids used as weights to hold the vegetables under the brine (image above)
Step 6 – Fermenting
Let fermentation do its thing! Almost immediately, you may see bubbling as the fermentation process starts and in a few days depending on the conditions your fermented vegetable mix should be alive and growing.
After a few days the brine will go cloudy – this is completely normal and shows a build-up of lactobacillus bacteria. The mix should have a fairly strong cabbage smell when the lid is removed and a pleasant acidic smell when the nose is closer to the vessel.
It can take between 3 to 30 days for your vegetables to be “ready.” Your fermented mixed vegetables are ready when they taste right for you so this means you should taste your fermenting vegetables every day or second day (after about day 3) to test them for taste.
My last batch of mixed vegetables took 9 days before they tasted just perfect for my liking. Temperature and other conditions like direct or indirect light can affect fermenting times.
I recommend keeping your fermenting vessel out of direct sunlight and in a position with a temperature range roughly between 10 – 25 °C (50 – 77 °F) – this works for me.
Step 7 – Bottling & eating (Final step)
When your lacto fermented vegetable mix is ready and tastes just right you can transfer the whole fermenting vessel to the fridge and this slows the fermentation process down substantially. Then, just eat it… The lacto fermented vegetables should last for a long time (even years) under proper refrigeration and good hygiene practices.
What I like to do is transfer the mix into smaller jars and then keep them in my fridge (or my spare fridge) this way I’m just using one small jar at a time and it’s easier to manage. Plus, I can give the odd jar away to family and friends.
If you have a cellar or someplace cool to store food say around 10°C (50 °F) or under then you can store your lacto ferments without refrigeration.
You can also use regular canning techniques to heat treat your fermented vegetables to be stored in the pantry at regular temperatures but this practice is counter intuitive to why we are making a lacto ferment in the first place because pasteurising food kills much of the goodness.
Keeping your lacto fermented vegetables in the fridge is the best way in my opinion!

Lacto fermented vegetables stored in fridge (image above)
Trouble shooting
Brine overflowing – this can happen if you overfill your vessel and the brine draws out more water from your vegetable mix. Simply, remove some brine.
Mould on top – If the vegetables have been exposed above the brine a mould may form. Remove the affected vegetables add more brine and ensure the vegetables are kept under the brine. A small amount of white mould may form on top of the brine – scoop out when present but don’t be alarmed.
If the mould is thick and green and you’ve neglected to check your ferment for several days then discard because the spores are likely all through the mix even if you can’t see them.
Smell – As stated earlier, if there is a strong cabbage smell (even if a little pongy) that’s normal. Try smelling close to the top of the vessel – it should smell vinegary but not unpleasant.
If the smell is obviously rotten (and you will know) then the mix has gone bad – discard. Next time add more salt to the brine and check if the fermenting temperature where the vessel is kept isn’t too high. Place the fermenting vessel somewhere where the temperature range is between 10 – 25 °C (50 – 77 °F).
If finding a cooler environment for your vessel is not possible and you live in a hot climate you may have to experiment with timing more than anything. That is, fermenting for only a few days and then transferring to a fridge.
Mushy vegetables – If your fermented vegetable mix has gone mushy and perhaps even slimy it is possible your batch has gone too far and the bacteria has broken the vegetables down too much. This could be due to similar reasons above as stated for “smell.”
The vegetable mix will still be edible (some European’s prefer their lacto fermented food this way) but most people will not find the texture appetising. Next time, don’t ferment as long at room temperature, try a cool place to ferment, and remember to taste the fermenting vegetable mix regularly and place them into the fridge once they are to your liking.
Too salty – The saltiness does subside as the fermented vegetables mature but if you find the mix is still too salty even after the lacto fermentation process has run its course then try using a little less salt until you get the taste to your liking.
Conclusion
So there’s my take on how to make lacto fermented mixed vegetables and more importantly why we should be making them.
In a modern world full of fast food and the demands for produce with a long shelf life our collective health is in serious decline from the inside out due to the weakening of the good bacteria we host mainly in our gut.
Making and eating lacto fermented food from our own fresh produce not only tastes delicious but it also helps to rebuild the populations of good bacteria in us, which in turn helps protect us from countless diseases and other ailments.
Edit: Almost 12 months after writing this article and making this particular batch I still have some left and it's as good as the day it was made – maybe even better!
Discuss this more by making a comment below or by joining our forum or even add your lacto fermentation recipe in our recipe section.
Mark Valencia – Editor SSM
Look, and see the Earth through her eyes…