
Feeling limited by your water tank capacity? Need to store more water but can’t fit the tanks under your guttering?
What if there was an easier way, so you could have what ever height tank you wanted, and still catch all your runoff?
Well there is! It’s called a sump system. When it rains, the water runs down from your guttering into a small tank. This small tank has an automatic submersible pump in it, which then pumps the water up into a larger tank.
Now this might sound like a complicated job, but it isn’t. You don’t even need a plumber- you can do it yourself. The materials you need are some normal rainwater guttering, downpipe lengths and components, some tek screws and silicone sealant. Initially I held the pipes together with little tek screws, as I wanted to be sure that the system was working. I later glued the pieces together and used silicone sealant to cover the little screw holes.

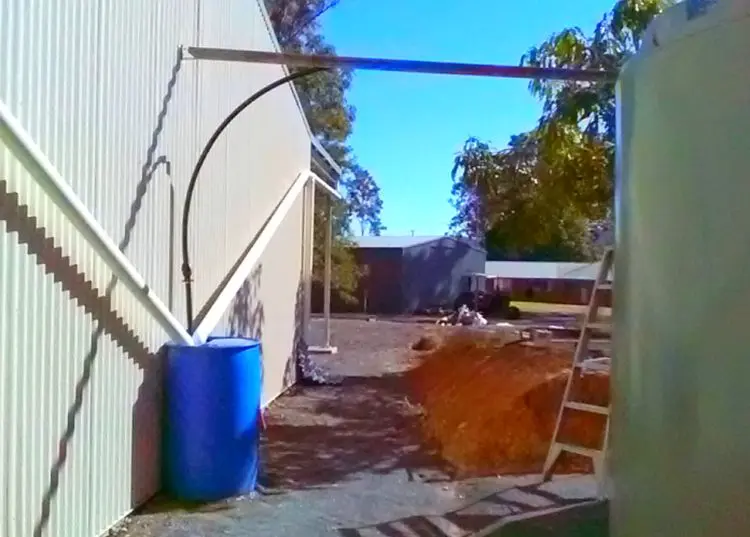
This system that I devised and implemented works as both a sump system and a bypass for the first (dirtiest) runoff water. The photo above shows the vertical downpipe, which acts as a first flush diverter. A first flush diverter, also known as a roof washer, directs the first volume of rain away from your rainwater catchment system to keep water cleaner. This vertical downpipe has a screw-on cap on the end, which can be removed periodically for cleaning. This doesn’t mean that the water will be rendered drinking quality, but it will be much cleaner and certainly invaluable for the garden.
I keep a bucket under the bypass pipe, which has a small hole drilled in it. Water drips slowly into the bucket, and I use this to water a few nearby pot plants.

I used a food-grade blue plastic drum and cut a large oval-shaped hole in the top. The hole needed to be a fair size because I had to fit the pump through it plus have working space for my arms. Additionally, the two downpipes needed to rest easily into the hole without splashing on to the pump sitting in the water below.
The pump shown above is one of two I bought. Murphy’s law, a pump will always fail when it is pouring with rain! So I have set up the spare pump ready to go. I can simply unscrew the outlet pipe off the failed pump and screw it on to the new pump then drop it into the water.
The pump sits on some bricks inside the drum. This is so that it doesn’t pick up any debris that has been washed into the drum. The tank has a piece of bird and insect mesh over the top that is tied securely in place with a ratchet strap. While it already has fine holes in it to prevent insects getting in, I had to make larger holes in it for the pipes as well. I affixed the netting to the pipes with zip ties, but hose clamps would also work.
Troubleshooting
This all sounds well and good on paper, but I did have a few small issues to contend with.
These submersible pumps shift an enormous quantity of water: so much that they create a centrifugal force which causes the whole pump to spin and lay on its side. So I had to tie it to the top of the drum, and leave it slightly suspended. I also had to tie the outlet pipe to the handle to hold the pump upright.
These pumps have a floating switch which can be set to turn on and off at your desired water height. Occasionally, particularly after a lengthy period of dry weather, it doesn’t turn itself off. I found that a good shake fixed the problem, ha!
You’ll need to have a power point fairly close by. The pump I’ve used comes with a 10 metre (32 foot) cord, but that might not be long enough for you. In that case, consider using a 12volt solar-powered marine pump instead. I had to do exactly that while waiting for an electrician to install a power point on my shed. The marine pump ran off a folding PowerTech 1000 watt recreational solar panel with charge controller fitted to it. All I needed to do was plug it into the little adaptor using an Anderson plug. It worked for me, but heed my warning, this setup was not as good as the cheaper pump which runs off mains electricity.
The marine pump can’t pump anything like the volume that the ordinary pump can. That means that in a heavy rain event, the sump system may run over. Don’t ask me how I know this!
12-volt pumps can be really expensive, and might not be ready for immediate use. I had to buy various components and fittings before I could install mine.