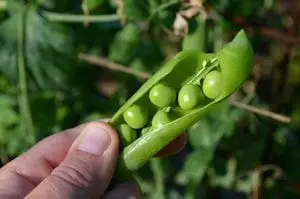
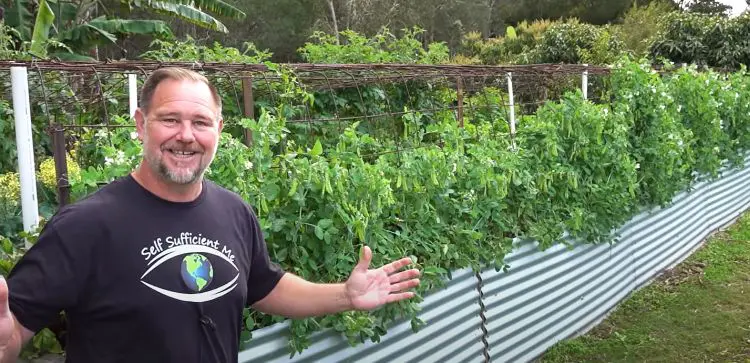
‘As easy as shelling peas’- well that’s how the saying goes- but is growing snow peas really that easy? Well yes, it can be easy, if you follow my 5 top tips on how to grow a ton of snow peas!
Snow peas are usually grown to eat whole, and they’re remarkably similar to sugar snap peas. In fact, sugar snap peas are a cross between snow peas and ordinary shelling peas.
Soil Preparation & Sowing
Peas are fairly resistant to poor growing conditions like poor soil and irregular watering, but if you want a good crop then you need to give peas optimum conditions.
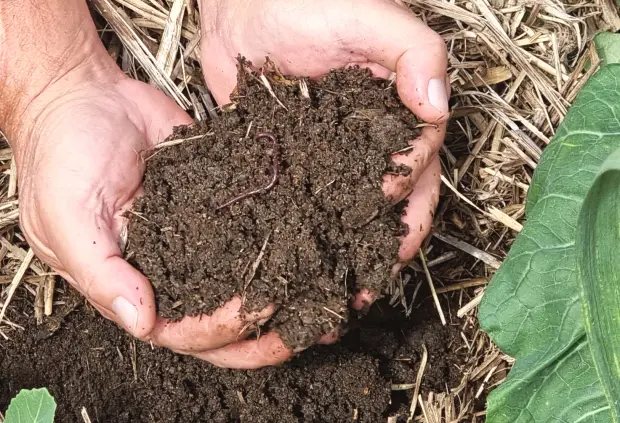
Soil preparation is one of the big keys to growing a good crop of snow peas. Prepare your garden beds well, with a top-up of soil, compost and animal manures. You need the soil to be rich yet have a free-draining structure & the ability to hold moisture. Peas need what I call ‘goldilocks soil’- not too heavy, not too light but ‘just right’.
Peas will grow better if you can sow them direct. Root disturbance often impedes the growth of vegetables, and this is certainly true when it comes to peas. If their root system can remain undisturbed right from the beginning, it will result in a stronger plant with good fruit production.
Sow pea seeds close together- about 1-2″ apart. This allows for some loss from insects, rodents and failure to germinate. Peas happily grow close together, so it won’t be a problem if they all germinate.

Once you’ve sown your pea seeds, don’t water them much until they germinate. Once they pop up out of the soil you should water them regularly. Peas are generally a lush crop that will get stressed from lack of water. Fruit that grows on plants that have been stressed won’t be as crunchy or tasty as it could be. Snow peas will let you know if they need water, as the foliage will start to wilt.
If you’re not sure whether your peas need water, you can do the traditional ‘finger test’ at any time. Stick a finger into the soil down to the second knuckle. If it comes up totally dry then you need to water.
When watering peas, try to avoid wetting the foliage. This will limit the spread of fungal diseases, which like a moist environment and whose spores spread via water droplets.
Where & When to Grow
Peas are a cool season crop and prefer a temperature range of 12-20C (55-70F) during the growing season. Some people say the name ‘snow pea’ derives from the fact that they can withstand some light snow and frost; this is pretty much true because snow peas will be just fine down to about -2C (28F). In the humid subtropics where I live, winter is just barely cool enough for snow peas. We sow from mid-late autumn after the humidity and summer rain has passed, until about July, so that the last crop matures in late spring, by which time it becomes too hot for them.
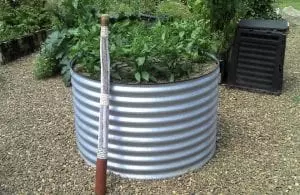
You can grow peas in any type of garden bed. They will do equally well in containers, in raised beds or in the ground, as long as the soil is good. A strong metal trellis that is accessible from both sides is ideal for growing snow peas. Not only does it make for easy picking, but it allows the peas to grow strongly & quickly by securing themselves to it with their tendrils.

Growing peas on a trellis allows for better aeration or airflow through the vines, which helps limit humidity & moisture build-up. This in turn dramatically reduces common leaf diseases such as powdery mildew. Peas are susceptible to wind damage, so you may need to use some twine to secure the plants flush against the trellis. This prevents any strong wind from bending the plants over & causing crop damage.
Nutrition & Fertiliser
Peas love a good quality growing medium that is rich in organic matter and trace elements. The idea that peas will do well in poor soils because they can manufacture their own nitrogen is false. If you prepare the soil properly before sowing by adding compost, manures and/or fertiliser, you shouldn’t need to feed pea plants during the growing season.
Peas, like other legumes, can produce their own nitrogen. They do this by using a bacteria in the soil to draw gaseous nitrogen from the air and fix it into the root zone. This nitrogen can then be accessed by surrounding crops. So it’s a good idea to intercrop peas with nitrogen-hungry greens like spinach, lettuce and silver beet.
Pests & Disease
Try not to spray pesticides or insecticides on peas at all– there’s no real window of opportunity where you can spray without harming pollinators & beneficial insects. The purported benefits of spraying are far outweighed by the long term damage it causes to your garden and its ecosystem.
If healthy pea plants are developing fungal disease prematurely despite your best efforts, try a milk spray. This simple organic remedy is super-quick and easy to make. Just mix half a litre of water and half a litre of milk together in a bottle and spray liberally over pea plants. Reapply as necessary and after any rainfall.
Keep an eye out for aphids, too, as they spread viruses which can quickly decimate a pea crop. Aphids target the young shoots, so will be most visible on new growth. Be sure to attend to them promptly by spraying with a home-made white oil, and spray at a time of day when bees aren’t around.

Harvesting
You should be able to harvest peas from about 9 weeks after planting, with full production after 11-12 weeks. Just like beans, regular harvesting encourages more flowers to grow which results in more fruit. I like to use scissors to harvest, because if you just pull the pods off you risk damaging the fickle stems. Just cut the pods straight across the top at the flower end.
Snow peas are best eaten immature and as a pod. If you leave them on the vine to mature the pods get stringy so are not as nice to eat. The peas inside, however, are really good and can be eaten like regular shelling peas. At the end of the season, be sure to let a few snow pea pods mature fully so you can use the seed for next season.

Snow peas will last up to 3 weeks in the fridge, but if you grow a ton of snow peas like me, you’ll need to preserve them. You can freeze snow peas if you blanch them first in boiling water. They will keep for a couple of months, but won’t be as good as fresh snow peas.
But my favourite method of preserving snow peas is by lacto-fermentation. Simply ferment them in a brine on their own, or you can do a jar of mixed vegetable sauerkraut. The beauty of lacto-fermentation is that it doesn’t just preserve food, it actually enhances its nutritional value. This occurs because fermentation breaks down some of the nutrients in food, therefore increasing the bioavailability of amino acids.
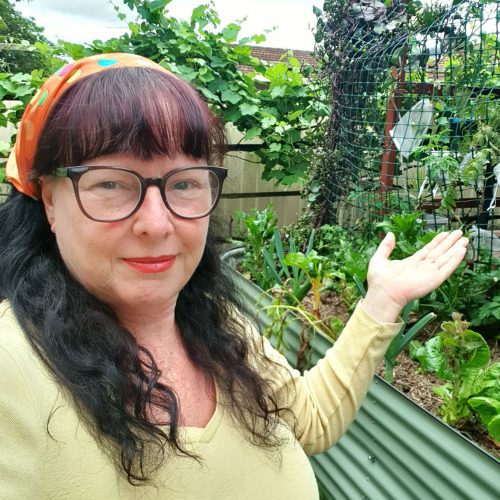
If you’d like to see how I grow snow peas in my garden, watch my youtube video below. Happy gardening!