High-raised garden beds are all the rage these days- and why not?! I’ve been using them for years for their many advantages. They’re fantastic to garden in, so convenient, easy to use and to water. But they’re not the quickest to fill, and they do take a lot of material.
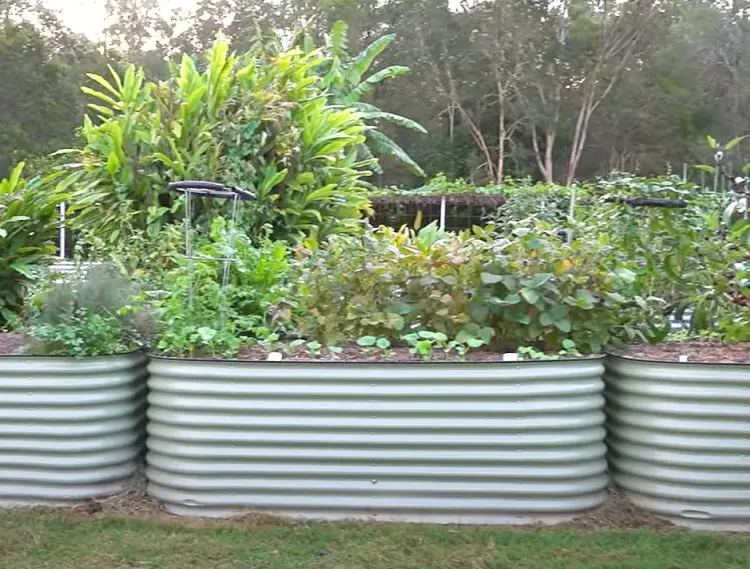
I’m going to show you how I filled my newest raised garden beds. I’ll give you my best tips on not only how to fill them, but how to fill them with premium growing medium that will make your veggies not just survive, but THRIVE for many years to come.
Firstly, get your garden beds as level as possible before you start to fill them. Keeping the beds level will ensure better plant growth, because it means that moisture will soak in evenly when you water. Use a spirit level to guide you. You may need to dig out around the edges to help with this. I used my Prong tool (see pic below) to remove the old sleepers then get the new beds to the right height. The prong is great for lifting heavy items, digging out tree roots, large weeds, all sorts of garden jobs. (If you could use a Prong tool in your garden, hit the link above- there’s a discount built in specially for SSM readers!). The beds might sink a bit over time too, but I don’t worry about that too much- after all, looks aren’t everything!

Now lets get to the filling. In this case I retrofitted the new beds over the top of old sleeper beds, so I had quite a bit of soil sitting around, as you can see above. Should you use that old soil in new garden beds? Generally the answer is yes, but place the soil according to its condition. So if you’ve got a great live soil that you’ve been improving, like adding compost & manures to it, and it’s full of earthworms, bacteria and fungi, then I would use that on the top.
If you have soil that is less than ideal, you could simply use it at the base of the beds. I kept most of the existing soil in place this time, as I was positioning new garden beds over the top of old ones. This has the benefit of maintaining the soil structure and the plant-food cycle. Once the beds were in their final positions, I shovelled the excess soil back into them.
All that shovelling makes for great exercise! Gardening so often has that bonus- getting a bit of a physical workout while doing something you love. It would be less work to hire a digger to fill these beds up quickly, but then you wouldn’t be getting that exercise. So don’t think of the shovelling as a chore, but as a workout you can do while spending time enjoying your garden.
The first (or next) thing I added was composted wood chip. I filled these new Birdies raised garden beds 3/4 of the way to the top with wood chip. There were a few large piles of wood chip sitting here from when I had some trees cut down a few months ago, so it had composted down nicely.

I strongly recommend you use composted wood chip, not fresh. There are two reasons for this. Firstly, new wood chip can heat up your bed for a while. This happens because new wood chip will start composting. As it breaks down it will generate heat, and therefore heat up plant roots for a month or so. This is no good if you’re going to be planting straight away. Secondly, new wood chip sinks dramatically. This sinkage can cause your plants to drop down into shade, plus you’ll need to top them up with more soil fairly quickly.
I filled the top quarter of the beds with premium soil. And you might ask, ‘what is premium soil and where do I get it?’. Annoyingly, the answer to that question isn’t simple. Premium soil has a few characteristics, so I’ve put them in a list to make it easy for you.
- it contains composted organic material
- it contains visible small rocks and stones. These have the minerals and trace elements it needs
- texture should be ‘just right’ – not too sandy or clay-like
- you should see bits of twigs, sticks and ash in it
- it shouldn’t have a crust on the surface
- it’s ideally a charcoal colour
It’s quite difficult to actually buy a premium soil. Some backyard operators mix some manures in with average to poor soil, and pass it off as a premium product when it just isn’t, so this is something to be wary of.
You’re better off mixing your own manures into your purchased soil, or buying soil from a reputable landscape supplier who mixes their own premium product. This is what I do, and the only thing I need to add initially is a sprinkle of blood and bone.

The top quarter of the beds contains the soil, or growing medium. I’ve overfilled it a little to allow for sinkage. Even though my woodchip is composted down, I will still get some sinkage over time. Garden soil is a dynamic environment with lots of microfauna activity. On top of that, plants use nutrients, plants get removed, plus soil does settle and compact over time. This is why I overfill them a bit before placing my sugar cane mulch on top.
To see this article in a video format, click the pic below to see everything in action on youtube. Happy gardening!