There are a few rules, do’s and don’ts to making compost in this way, so I thought I would start with one bin (of the 2 I have) to test how it would go and if it would go well, I will start to use the other one too.
I have been using it for about 4 months now and I will tell you what I did, what are the rules and how it is going so far.
How did it start?
When I inherited my childhood home, I also inherited two composting bins or barrels with it. My mother had bought these 2 composting bins, many years ago, so she could start making her own compost. A very good idea of course, and she started very enthusiastically, but failed miserably because she did not know what to do to make it a success. So the 2 bins just sat there, in the very back of the garden, because it didn’t work out.
And then here I come, 30 years later, and thought I would give it a go. Why not? I thought to myself, they are just sitting there and they are still usable, lets’s start with one and see what happens.
So I did some research on how to use this type of composting and set out into the garden to begin.
What did I do?
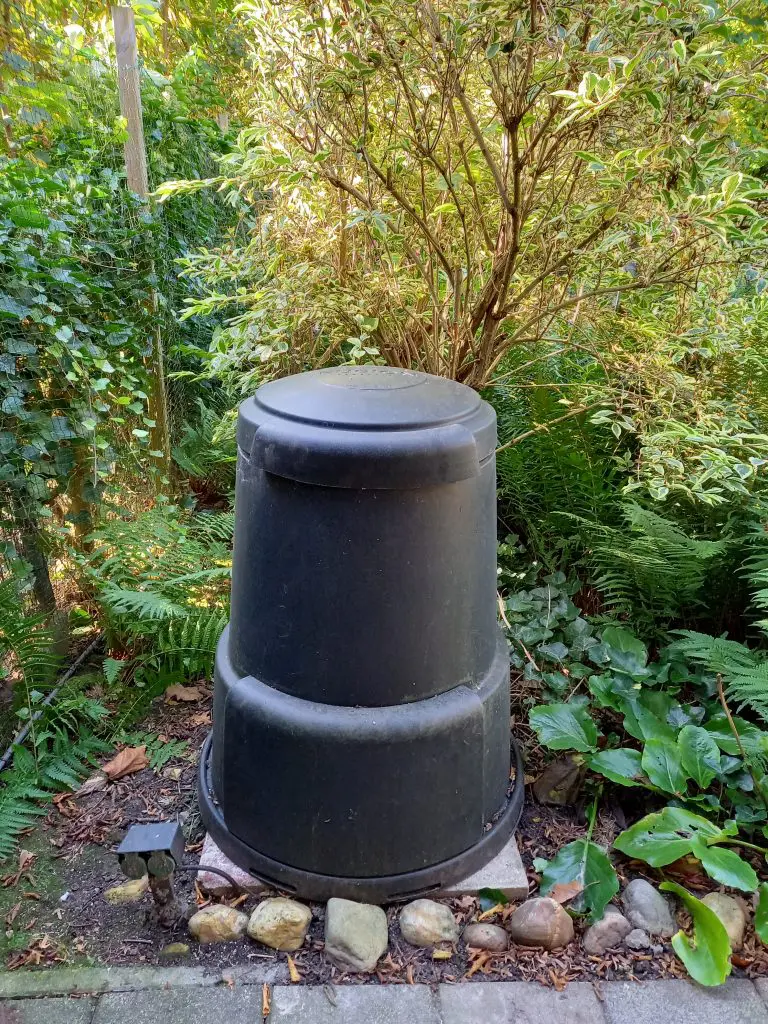
I cleared out one of the bins, cleaned the thing and placed it under our back deck.
I thought about putting it in many other places in my garden, but they all seemed wrong. It was too far away from the house (I am not walking every day with my kitchen scraps to the back of my garden in the rain or cold or both, no thanks!), or too much in view (ew, eyesore).
So I decided on putting it under our back deck, even though I know it is not the perfect place because it will not get enough sun/warmth there. But then again, in my garden, there are almost no spots where there is enough sun, so completely disregarding rule number one… under the back deck, it is.
I pulled away some of the plants in the border, which starts right after the tiles from the terrace below the deck, to make room for the base of the bin. Immediately felt sorry for the plants I pulled out, so I planted them somewhere else and they are doing well.
Starting with the basics
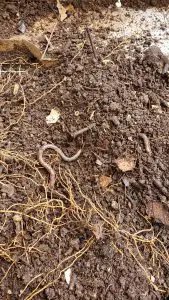
Besides the rule of placing the bin in a spot where it gets enough warmth (this rule only applies when you live in a colder climate), it is very important to place the base on the soil, so worms and other good creatures can come through the holes in the base.
But it is also important to place the base on some tiles or stones, so if there is too much moisture in the materials you put in, it can drain. Plus the bin will get heavy, so placing 4 or 5 tiles under it will stop it from sinking into the soil beneath.
So I placed the tiles on the soil, about 3 to 4 centimetres apart (good creatures and draining, remember?) and placed the base on top. After that, I put everything else together and I was ready to start filling this bin and making compost.
But how and what can you put in there to make good compost using this type of method?

What to put in
The first layer you put in should be what they call “brown material”. This is dry material like small dry twigs and dry leaves. Any plant material that is dry and small is good really. This creates room and airflow from the bottom up.
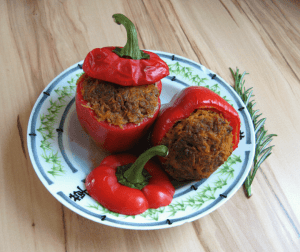
After that, you can begin adding “green material” like fresh garden clippings and kitchen scraps. Raw vegan kitchen scraps that is. So nothing cooked, no meat and no dairy products. These can kill the good creatures and attract the bad ones.
Although I have to be honest, I do add in my milk kefir grains when I have too many of them. But those have lots of good creatures in them (those milk kefir grains are living probiotics) so I think that will help the composting process.
If the garden clippings or kitchen scraps are too big, just cut them up into smaller pieces. The smaller, the better. This way the microbes, worms and other good creatures can process it more easily and faster, so the chance of mould or smells are reduced.
When you have a layer of kitchen scraps, you add in another layer of dry leaves or other brown material and so on. Switching from brown to green materials in order to create a good balance between wet and dry, plus making sure there is enough air as well, so the worms and microbes can move around more easily and thrive.


Give it air
Another way to get more air into your compost bin, to help the good creatures make the best compost they can, is to use an air-stick. I am sure there is a good and scientific name for this stick if you know it please send me a message, but that’s the name we use in our house.
About once a week you use this air-stick to make air pockets. You stick it into the compost, until you hit the base, turn it a quarter, and pull it up. You do this evenly spaced in about 8 or 10 places. This way, you also pull up good creatures from the bottom to the top layers so they can get to work in the top layers as well.
If you notice that what you are pulling up, when using the air-stick, is dry, just wet the materials with a little water.
So this is a good way to check the moister content too. Everything should be not too wet and not too dry. If it is too dry, add some water. If it is too wet, add some more dry/brown materials.


Patience
Just go on like this until you have compost at the bottom of the bin or the bin is full. This can take from 7 months to up to 2 years. Depending on the conditions of where you live, the placement of the bin, the temperature inside and outside the bin, how many good creatures there are, what kind of materials you put in and so on.
Of course, I am not there yet, but I am seeing that the bits at the base are getting smaller. So it is doing something!
I think it will take at least a year for me to get good compost, but I cannot tell yet. It is just a matter of waiting and trying my best to make it easier for the good creatures and give them a good home, so they work their magic.
To get this magic started in the best way possible, I have added in some compositing worms (about 50 worms I bought from a fishing store) and even the occasional sprinkling of compost accelerant, which I found hidden in a corner of my basement. I thought it might still do some good.
But of course, these two things are completely optional.

Is it ready yet?
To check if the compost is ready yet, you can remove the lid at the bottom and see what is happening.
If you can only see black soil-like material, it is ready!
When it is time to ‘harvest’ the compost, remove the whole bin top and first scoop away the first layer of the pile which of course, is not ready yet. Scoop it aside and save this for later. You will be putting this back into the bin after you have scooped out the good compost.
Now harvest the good compost and set it aside to dry a bit, because the compost is probably still too wet to use immediately.
Clean the bin and the spaces in between the tiles and set it up again.
Begin by putting in a layer of “brown” material and scoop in the compost that was not ready yet, back in. And repeat the process as before. Alternating between brown and green materials, layer after layer, until you have new compost. Completing the cycle.