Picture yourself standing in your garden. Looking around, right to left, up and down, admiring the results of all your hard work. Beautiful flowers, deep green leaves, fruit on the way to ripening….BUT WAIT! You spot one plant that is shrivelled, sick, and covered in bugs. Turn the other way, and there’s one with yellow leaves. What the what?!
This is a message from the ground you’re standing on….and that message may well be ‘mineral imbalance in the soil’.
Nutrient deficiencies in soil are common throughout the world. While we try our best to build and maintain soils both at the home gardener and commercial levels, the practice of agriculture is an intensive one which depletes all soils. Add to this the modern processes of land clearing, tree felling for housing development, industrial pollution…you get the picture. Mineral imbalances are a significant issue and can have a detrimental effect on the health and harvest of your plants. If one mineral is deficient, it may create an oversupply of other minerals which ultimately leads to plant damage.
But how do I know what my soil needs?
There are a couple of ways to find out. A visual inspection of your plants’ leaves, or leaf analysis (explained below) and/or a soil PH test will reveal what you need to know.
Along with mineral balance, correct soil PH is vital to ensuring optimal plant growth and crop yield. A PH testing kit for soil can be purchased from any large hardware store, and is easy to use. It will measure the alkalinity (sweetness) versus the acidity of your soil. The PH is also an indication of the availability of minerals, demonstrated in the chart below.

Agronomy research suggests that it is the ratio of soil minerals to one another that is most important in getting great gardening results. (You can read more about that here). Get these ratios right and you’re on a winner!
These are the Mineral Ratios That Affect Your Plants
Calcium: Magnesium This ratio dictates how much oxygen will be available to your plants via the soil. To use an analogy, let’s say the soil ‘breathes’ when it photosynthesizes (photosynthesis is when the roots and plant leaves take in oxygen and release carbon dioxide into the air). The better it breathes, the better the growth, and the calcium to magnesium ratio governs this whole process. Magnesium in plants is comparable to iron in the human body. It provides the vehicle to move oxygen around the plant, and this is done via the sap. At the same time, calcium works by effectively providing aeration so the magnesium can move around efficiently. So they both work together to build and maintain soil fertility.
Magnesium: Potassium Just like magnesium, potassium is vital to photosynthesis, but it’s also critical to plant immunity. Both magnesium and potassium can be measured in parts per million, and the ideal ratio is 1:1. When this ratio is achieved, the uptake of both minerals into the plant is not only optimised, but increased.
Phosphorous: Sulphur Phosphorous is very important for crop quality, colour of fruit, disease protection and production of the sugars which make fruit sweet and juicy. It is also heavily linked to plant immunity. Sulphur plays a different role, ensuring that plants are able to build essential proteins and amino acids. Sulphur is most commonly stored in humus, so as a home gardener, if you can build up your humus layer, you’re on the right track. This ratio also requires 1:1, and as with the magnesium: potassium, a perfect balance ensures optimum uptake by the plant.
Phosphorous: Zinc Zinc helps phosphates energise effectively within the plant. It is also linked to moisture uptake, and helps the plant fix nitrogen into the soil. The two work together to govern leaf size, which in turn affects photosynthetic activity. So effectively, this ratio determines the size of the leaf and thus the amount of solar energy absorbed by the plant in order to make the required glucose. The ideal ratio is 10:1.
Iron: Manganese Iron and manganese are both essential for plant resilience, and work together to help plants ward off pests and diseases. More iron than manganese is required (2:1). If the balance isn’t right, these two minerals will work against each other.
Potassium: Sodium. Potassium is the second most common mineral in the plant after nitrogen, and it does a number of jobs. Most particularly, it enables fruiting and increases flower fertility, which ultimately affects your fruit size. That is to say, at the very beginning of flowering it moves to the growing tips so that each flower is viable If there is enough potassium, the fruit will set and become viable to maturity. As it is water-soluble, it’s highly mobile within the leaf structure and can quickly move to where it’s needed. On the other hand, potassium can leach out during heavy rainfall or if over-watered. The likely desired ratio of these two is about 4:1, but ultimately you don’t want too much sodium in your soil; let’s remember that sodium is basically salt.
Molybdenum Obviously not a ratio, but an an important single trace element. Molybdenum allows plants such as green beans to fix nitrogen from the atmosphere into the soil at an optimal rate. It also aids the plants immune system, by helping to convert nitrate to protein. As shown above, it is deficient in acidic soils.
LEAF ANALYSIS
Leaf analysis is the quickest and easiest way to ascertain problems with your soil. The chart below shows what the various deficiencies look like.

The following six deficiencies will tend to appear in older leaves first.
- Nitrogen: A lack of nitrogen means that the plant doesn’t produce enough chlorophyll for full photosynthesis, leading to yellowing leaves, stunted growth, leaf drop, and premature maturity.
- Cobalt: Shows the same general symptoms as nitrogen deficiency, but affecting only legumes such as peas, beans, and nuts.
- Magnesium: Pale leaves with yellow patches, although the leaf veins and part of the stem end remain a healthy green.
- Potassium: Yellowing leaves with brownish-red scorching around the edges. Also discoloured spots surrounded by paler areas.
- Phosphorus: Stunted growth, leaf drop, and dead brown spots around the leaf edges.
- Molybdenum: Speckled discolouration, curling and cupping leaves, and malformed stems.
The next six deficiencies usually affect the youngest leaves first before spreading around the plant.
- Calcium: The leaf tips hook sharply downward, with the symptoms progressing to blackened leaves and eventual plant death.
- Sulphur: Widespread yellowing, plus underdeveloped leaves with edges curled downwards.
- Iron: Yellowing, pale-coloured, or translucent leaves, but with the veins keeping their normal green colour.
- Copper: Leaf tip death, yellowing, and malformed growth. If the plant survives until flowering, flower production will be severely reduced.
- Zinc: Underdeveloped leaves growing in bunches, with a yellow or white mottled appearance.
- Boron: Leaves turn yellow at the margins, then blacken, crumple, and die back from the tips.
And lastly, this final deficiency can affect leaves of any age, but will tend to appear in middle growth rather than the oldest or youngest.
- Manganese: Yellowing between the leaf veins, with the veins themselves turning a pale, sickly green and losing their definition. Often occurs in waterlogged conditions.
Getting the Balance Right
Given that many soils are poor to start with, and that vegetable gardening depletes them further, how do we fix all these problems?

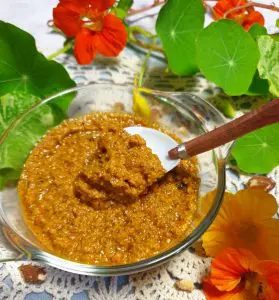
Well, there is no *one* quick and easy solution….but adding home made compost is as close as you’ll get, and it’ll fix a myriad of issues in the home garden. Compost is a universal soil improver, and is the result of decomposed organic materials like kitchen waste, grass clippings, shredded paper, eggshells, manures, etc. When it has fully broken down, you are left with a rich soil additive that provides minerals, organisms, microbes, to the soil, plus aids water retention and improves the overall structure of the soil. And even better, it’s a low-cost solution!
Bear in mind it isn’t the be-all and end-all, but well-decomposed quality home made compost can make a significant improvement to your soil quality and gardening results. Serious or extreme mineral deficiencies may be need to be addressed individually though.
How To Make Your Own Compost
There are lots of ways to make your own compost- vermicompost, cold, or hot pile. Choose your own method according to how much space and money you can allocate to it. Below are just two examples.
The principles are the same for every type of compost system; and they’re very simple: layer and mix your kitchen scraps (excluding meat, dairy and bread), coffee grounds, eggshells, lawn clippings, tree prunings (cut up small) and ‘brown material’ like shredded paper, cardboard or wood shavings, manure/s if you can get some, moisten it all and then wait for it to decompose. This leaves you with a rich ‘black gold’ soil booster that will improve your soil and fertilise your plants.
I have built the below vermicompost (also called a worm farm) system from recycled materials, and it works fantastically well! I call it my ‘compost bathtub’. Once a year I dig down to the bottom and remove half the castings. The castings are your compost, which can be added to garden beds. A vermiculture compost system like this also provides liquid fertiliser. Every time the system is watered (once or twice a week), the runoff can be collected and used on your garden. It may need to be diluted if too strong. What I’ve done here can be scaled down if you have less space. Gardening Australia has a short video here showing smaller vermicompost systems made from large plant pots and styrofoam boxes.

Top left: A long handled cultivar fork is laying where the next days kitchen scraps will go. I move along the tub from left to right, adding scraps every second or third day. I make a furrow half the depth of the compost, add my scraps, then drag the loose material back over the top. The worms are thick in there so I use that particular fork because it doesn’t harm the worms.
Top right: Insulation from temperature changes is important, so I’ve placed a layer of arrowroot leaves on top. Hessian bags or old mats would also work. If it’s hot weather, the worms will move down towards the base of the tub where it’s cool and damp, and vice versa.
Bottom left: I have a rodent proof ‘door’ on top which simply lifts up and down.
Bottom right: A sheet of corrugated iron forms the lid. It keeps out the rain and the shape allows for aeration.

Mark has a great video here on youtube explaining how he made this simple cold compost ring, where his chickens will help turn it over and decompose it. It’s a simple outer ring filled with all the abovementioned composting ingredients. This will provide useable compost within four months, and is another great way to make your own compost for free at home.
If you need something larger, why not try building your own 3-bay system? Click here for full instructions.
Happy gardening!