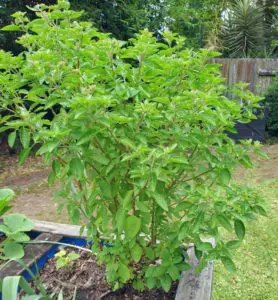
Domes are such an ideal use of space in the garden, providing heaps of ground area as well as protected height if you need it. My reason for building this dome is probably obvious: to prevent the larger critters from stealing my vegetables and fruit…I grow produce for myself, not for them!
At my place, there are many food predators such as bats, possums, several varieties of birds, cabbage white butterflies, night moths and corn earworm butterflies. The mesh I’ve used here doesn’t keep out rodents, grasshoppers, small moths, small butterflies, fruit fly or wasps, but it does keep out the main offenders, and that suits me nicely.
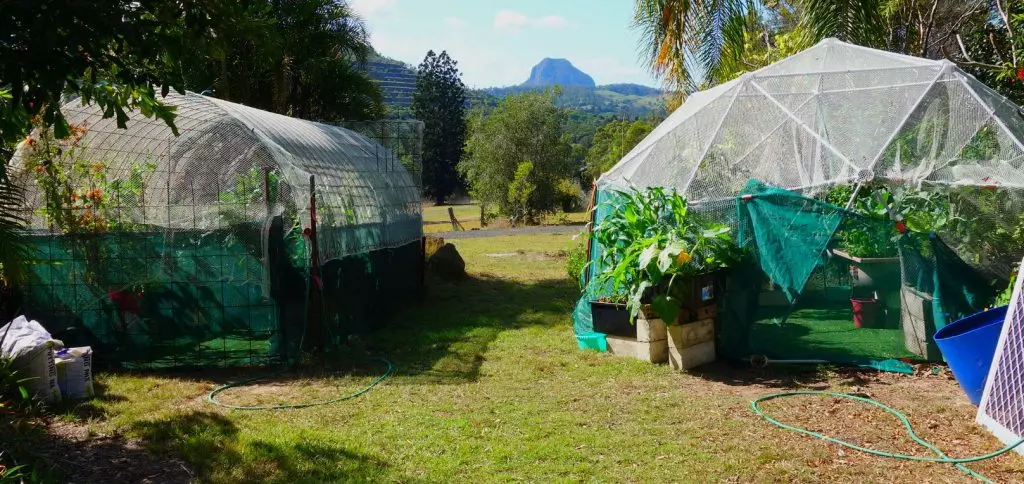
The dome I’ve built is called “The Zip Tie Dome’, (website link https://www.ziptiedomes.com/index.htm ) and I managed to buy the last one in Australia. Mine is 5 metres across and 2.5 metres high. Known as the 2V type, this roughly means that the struts forming the triangles come in two lengths, and these lengths are held together by the trademarked hub sets (the rounded pieces shown in the photos). A 3V dome is also available, which would have three different lengths of strut and would form an even larger and stronger dome.
As an aside, the Zip Tie Dome franchise is available for purchase in Australia, but as it stands the conditions do not comply with current Australian franchise laws, so I never took it up personally. The man who owns the trademark for the hubs defends it vigorously…however, you can purchase the hub kit from him via the website linked above, or buy the plans. For a small extra fee, he will add the silo wall plans, which allow you to raise the height of the dome.
I did purchase the plans to add silo walls to the bottom, which would make my dome 3.7 metres high at the apex and 5 metres wide. This would be useful if I wanted to grow small trees or tall shrubs in there. Also-thinking outside the box-if it was made from steel or timber, the dome could be used as a glamping tent, yurt, or temporary home, as the wider domes would fit a mezzanine or loft inside…oh, the possibilities!!
Usually, these domes are constructed from the ground up, but since I am disabled and can’t climb a ladder or raise my arms very high, I constructed this dome my own way. I assembled the apex section upside down on the ground, then rolled it over and added the last row of struts and hubs around the bottom. I built the whole thing alone in three hours. Happily, I found that the manufacturer marks the struts either red or blue according to their length, so they were easy to put together, and generally the instructions are easy to follow.

To hold the bird mesh and shade cloth in place, I made from scratch around 80 heavy-duty plastic clamps. I’m a person who strives to use, recycle and/or reuse materials I already have lying around, so combining my existing skillset as a fitter in designing and manufacturing with some orange conduit I had sitting here…I was set!
But first I must give a warning regarding the use of the orange conduit: making the clamps took a whole day, requiring a cordless grinder for cutting (I had it clamped to my workbench), many hours of rasping and sanding, and a lot of elbow grease. I also had to wear full PPE (i.e. a dustproof helmet, respirator, goggles and gloves), because the fine dust that comes off the conduit is toxic and can’t readily be expelled from human lungs. If you don’t want to make your own clamps you could stitch the mesh to the frame or come up with your own alternative.
I wrapped the shadecloth around the bottom struts, clamping it on as I went, which was a simple task. As the bird mesh stretches bi-directionally, it is sufficiently flexible to fit over the dome. I folded it in a narrow line with the folds facing up and rolled it up halfway then threw it over the apex of the frame. The folds fell open easily as I pulled it down all around and clamped it off under the shadecloth.
By then there was a vicious storm coming and it was almost dark, so I confidently left the dome hidden in the lee of native trees and went inside. In the morning there was debris everywhere and the dome was gone- there had been enough windage in the mesh to make a sail! I found it hooked on the barbed wire fence about 80 metres away and it had collapsed like a clam. Two struts and some of the hubs were broken, plus one strut was bent into an ‘S’ shape. Over the next few days, I repaired the dome, moved it to its permanent position and pegged it down with three steel posts (star pickets). One can be seen driven into the ground against the left side of the dome in the top picture of the two structures. The dome is tied to the top of the steel post through the hub with the wire tape.

I used my mini tractor to bring the big double house bricks to the site and stacked a few where I expected the bathtubs to finally rest. A little shuffling around, and the first tubs were in place with some black container tubs in between the bathtubs to fit around the circle. To make a stable and well-supported place for the black tubs, I laid old fence palings across the tops of the piers I built from the house blocks.
Installing the fake grass came next. Before any of the central bricks and tubs were installed I laid the fake grass- it made such an impressive difference! I was very satisfied with the look, as it tidied up the whole picture and made walking inside far easier without muddy feet. Now, seven months later, it is still a real benefit. I’m glad I purchased a whole twenty-metre roll as it was just enough for the two structures.
The potting mix I bought was expensive and requires topping up at the end of each season. It is organic, as is the whole garden and most of my property. I use a locally made product from a company that strives to make all its products organically certified but still suitably priced for everyday use by everybody in the community. Other products that go into the growing medium are cocopeat (coir), locally made organic chicken manure pellets, some trace elements and perlite. The recipe I use is ten parts potting mix, ten parts soaked cocopeat, one part manure pellets and two parts perlite. I mixed these ingredients together in the wheelbarrow first, then filled the bathtub and containers with it using a bucket. I don’t put the plug in the tub outlets but I do put a piece of old flyscreen mesh over the hole to prevent potting mix from falling out or mice getting in. We have a rodent plague in Australia right now and they would love to get into the tubs.
Since there is no need to completely fill the bathtubs to provide sufficient root space, I lined the bottom of the tubs with clean 3-litre milk bottles full of water. In one bathtub I used the polystyrene packing from my new freezer, which was just the right length when cut up. For the black plastic 45- and 60- litre tubs, I used four two-litre milk or juice bottles. I didn’t stack them in tightly but left them standing up, using four bottles per container. Their tops stuck out just a tiny bit so I planted my seedlings in between where they could send roots right to the bottom for stability. I can also push in stakes right to the bottom of the tubs if I need to.

December 2020
The rectangular tunnel house was a far simpler project. It is made from sheets of concrete reinforcing mesh (commonly known as reo), steel posts, shade cloth, and baling twine.
To construct the tunnel house, I ran a rope to form the baseline where I wanted the far side of the structure to be. I drove in three steel posts, one at each end and one in the middle. The sheets of reo are placed with their short ends pressed against the bottom of these posts. I took hold of the other short end and pushed it up into a semi-circle arch. The cut ends of each sheet dug into the ground while I drove in a post against the corner to hold the sheet in place as it wanted to spring back flat. This would have been easier with two people. I repeated the process with the other sheet then jiggled them around to make the structure square and the exact right width.

I already had some half sheets left from a previous job so they became the ends, one tied off permanently and the other forming a hinged gate which you can see in the photos. The shade cloth was sewn onto the reo. The mesh was thrown over and sewn down with baling twine. The closed-end was wire twitched to the sides while the other was only attached down one side to form the hinged gate. I had to climb a ladder to sew the mesh onto the top of the arch, but I have a five-foot ladder that has wide steps so it was stable enough for me to climb to reach the top of the tunnel.
The whole process took around four hours including rolling out the two lengths of fake grass and pinning them down with small steel tent pegs. The tunnel is easy to extend to whatever length you want just by adding more sheets of reo to one end. Mine is only two sheets long but you could make a tunnel four sheets long by simply driving in more steel posts to hold the bend and tie it down to the ground.
Next time in part two: planting, light dramas, & a steep learning curve.