Introduction
It's all well and good to produce your own food, however, if you don't cook it correctly or at least with some imagination your home-grown produce can be a tad bland. So true is the notion you don't need to do much to make good food taste great and I'm the first to preach it; but, several good foods together taste even better. Furthermore, the method you use to cook that food and what you use to implement that method is vitally important in determining the final outcome, which is taste of course.
I do find the many ways we humans cook interesting and barbecuing fascinates me. My first article on SSM about the hunter/gatherer theory can also be seen in modern day cooking techniques. We know our ancestors cooked over open fire and although today we have many other ways to cook and enjoy food (like microwave, convection, roasting, induction) meat and vegetables grilled over fire is still very popular. So even with advances in technology, the ancestral link to our original way of cooking still remains strong.
For this quail recipe (in particular) to get the best results you'll need a hooded barbecue (BBQ), preferably a Weber Q. I did already have a large hooded BBQ (a 6 burner Jackaroo from Kmart) and whilst this barby is big and does a fair job cooking an average steak, sausage, or kebab the thin hood looses too much heat for serious roasting, gas regulation is iffy, unevenness in cooking, poor gas usage, and the lack of portability was a factor in my decision to hunt for another one. All the same, any hooded BBQ be-it charcoal or gas will give you good outcomes so I'm not insisting everyone goes and buys another BBQ like I did.
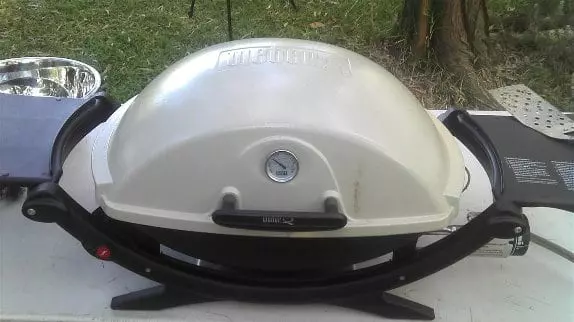
About My Weber Q 220
Firstly, there are many different types of compact hooded BBQs on the market and like all brands of any product they are definitely not all equal. Also, I haven't been commissioned to write about Weber BBQs either; nevertheless, I'll write and talk about anything I believe is worth its salt because if my research and practical use of a certain product helps others with deciding their choices of what to purchase – it's a good day. For the record, I will never review or endorse a product I don't personally use and I will only recommend items that impress me.
I searched and shopped and Googled for several months before I settled on my Weber Q 220. A friend of mine has a Weber Q and I must admit being impressed by the gastronomic outcomes he served up and his glowing endorsement of the product; however, I still wasn't convinced I couldn't find a similar or better product out there for a better price, so instead of taking his word for it I started looking.
This is the “ability” criteria I required when searching for my (second) BBQ:
-
Portability – my new BBQ had to be easily set-up/packed-up in my backyard picnic area and also be taken on camping trips.
-
Practicability – although portable, the new BBQ needed enough cooking space to feed at least six adults (at a go) – I didn't want to “batch cook” in-lieu of portability.
-
Cleanability – it needed to take no more then 5 minutes to clean.
-
Cookability – food should not only cook fast (if I want) but taste like good barbecued food, that is, with a grilled, smoky, caramelised appreciation.
-
Usability – I didn't want some brick fired, dirty charcoal burning, hit-and-miss, over priced, slow cooking gimmick that I had to slave behind for hours poking cinders to get the temp just right. I wanted clean easy start gas cooking at its best (with lots of self-generating smoke to penetrate the food for flavour).
-
Robust-ability – I like things made to last and I wanted a BBQ that could take a few knocks, bumps in the road, repetitive use, and still not let me down.
Because part of my 'ability' criteria was portability mainly for camping purposes, I initially focused on camping stores and equipment to find a purpose built product marketed for camping that I could still use at home. Unfortunately, most of the products I saw were too portable meaning, they were small, light, flimsy cookers similar to what I had used in the Army and although they were well priced I know how easy these things rattle to bits “off track” and unless you cook stew they're no good for feeding more than a few.
There were larger “camping cookers,” however, they were still flimsy, most only had one-side grill, and I was shocked at the steep rise in price compared with the smaller versions. Some of the larger cookers were the same price as a Weber Q!
Then, I decided to look for something similar to the Weber Q that was more like a home BBQ but portable enough to take camping. Well there were plenty of BBQs to play with, but all of them except one weren’t even close to the build quality of the Weber Q. Some looked promising – at half the price of a Weber – I admit I was tempted and I expect these 'cheapies' would likely do an ok job too; nevertheless, deep inside I knew there would be issues 12 months down the track as some of these devices couldn't even pass my “wobble test” in store let alone outdoors!
Trying to cut a long story short, after visiting many outlets, talking to sales people, reading reviews, sampling food cooked on promotional weekends, and playing with every BBQ I walked past, I came full circle back to my good friend's advice on getting a Weber Q… sigh, I probably should have just taken his word for it.
Like I said though, one other BBQ did come close to matching the Weber Q and that was the Everdure e2. The Everdure e2 has a similar cooking area to the Weber Q 220 and good lid clearance (for roasting larger cuts of meat). Also, the design was very similar with a quality grill plate and a drip system. Price was similar too and that is what swayed me more towards the Weber Q 220. If the Everdure e2 was $50 – $100 cheaper I may have gone with it but for a similar price the Weber Q 220 was still a better finished product.
Compared with the Everdure e2, the Weber Q 220 had a more stable feel, a better lid, electronic start, better designed gas adjustment dial, and the Weber is made in the USA, where as, the Everdure e2 is made in China. Not that the Chinese don't make some quality products, it's just in my opinion BBQs aren’t one of their best exports.
There are several types of Weber Qs some smaller than the Q 220 and some bigger. In Australia, the Weber Q 200 has less hood space than the 220 btw so if you want to roast big I'd get the 220. Also, I didn't buy any of the major accessories like the trolley and I have found mine easy enough to carry around and plonk on a table or bench for cooking. However, I did buy the grill brush and I use it with a water spray bottle to clean the grill after cooking whilst it is still hot. There are a full range of accessories for the Weber Q, if you desire, but they're a little “exy” and things like drip trays can be purchased from your supermarket cheaper.
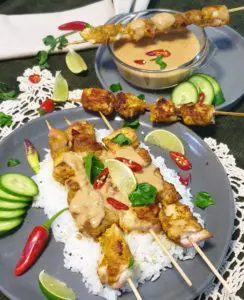
Let's get Cooking! Piri Piri Quail Recipe
This quail recipe easily feeds four people (allowing for two quail per person). The inspiration for this dish was influenced by a mix of experiences through overseas work, holidays and what I had growing at the time. To give the recipe a one country origin just wouldn't work; therefore, I'd classify it as a Portuguese, North and South African, East Timorese, with a dash of Indian dish. And, to those friends who asked me for the recipe at our last barbecue ( Justin, Nicky, Karren, Michael, Gavin and Kerri) here it finally is and I apologise for making you read my blog to get it but at least I know for certain I'll get six readers!
I'll leave the side dishes up to you but I suggest serving rice (fried or plain) or couscous would be nice and a mixture of stir-fried greens. 
Ingredients
-
8 x Quail (butterflied – with or without skin)
-
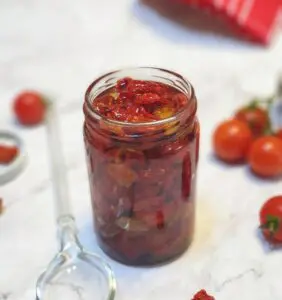
¾ cup finely chopped (or processed) birds eye chillies (or any chillies you have medium-hot or mild – leave the seeds in if you like extra bite…I do)
-
1 x cup finely chopped fennel (leaves, soft stems)
-
1 x cup finely chopped coriander (leaves, soft stems)
-
Table spoon of crushed garlic
-
2 x table spoons of finely grated ginger
-
2 x table spoons brown sugar
-
3 x table spoons canola oil (or olive oil)
-
A few good pinches of cooking salt (or any salt)
-
4 x lemons juiced and then chopped into small pieces (keep the juice)
-
Plain yoghurt – for a side dollop (optional)
Method
Marinate
- If you haven’t butterflied the quail then do so by cutting down the back with kitchen shears, cut out the neck bone, then turn the quail breast-side up and lightly press down to flatten out the bird.
-
Place the chilli, fennel, coriander, garlic, ginger, sugar, oil, salt, chopped lemons and juice into a mixing bowl and mix with a spoon well – this is the marinade.
-
Put the quail in a dish or bowl (or the same mixing bowl as above if there's room) and pour the marinade over. If you are sensitive to chilli or don't want your eyes (or any other sensitive body part) to burn next time you touch them, I recommend the wearing of disposable gloves for this next bit. Massage the marinate into the quail ensuring all the quail is touched and covered – if you need more mixture you can add some more lemon or oil to stretch the marinade (even more chilli and ginger wouldn't hurt).
-
Leave the quail to marinate over-night in the fridge or if possible for 24 hours.
Grilling
- Pre-heat your Weber or hooded BBQ for at least 10 minutes. If you do have a Weber, pre-heat until the thermometer reaches maximum.
-
Just prior to cooking, remove the quail from the marinade and scrape off any excess (a little left on is no issue).
-
Place the quail on the grill breast-side up and close the lid. Start a timer (I use my phone) and grill for 4 minutes then turn the quails over so breast is down, replace the lid, and grill for a further 5 minutes (9 minutes all up).
-
Your quail should look slightly charred when cooked and if you are still not sure make a small cut in one of the quail at the thickest part of the breast to the bone and if the juices are clear not red it's cooked enough. Just ensure you do not cook the quail too long as the meat can be unpleasantly dry when overcooked – it is a small game bird after all.
-
Serve as a platter or individually plate-up with a dollop of yoghurt on the side and a sprinkle of fresh coriander leaves with whatever side veggies you prefer.
Conclusion

At the end of the day, the quail should have a barbecued char-grilled smoky flavour due to the method of cooking with the Weber Q (or hooded BBQ) generating enough smoke to penetrate the meat. The flavour of the quail should still be noticeable and the marinade should have given it that tasty-tangy piri piri lift to keep people gnawing at the bones (especially the legs).
I personally am convinced the Weber Q is one of the best BBQs on the market to use in implementing this type of cooking task. Suffice to say, I would recommend the Weber Q 220 as it definitely does create excellent grilling results.
Don't be afraid to experiment with my recipe to make it taste better for you and one last hint would be to grow your own chillies if the taste appeals to you – they are very easy to grow… but that's another story… in a different category.
Thanks for reading and please leave a comment below – I'd like to know what you thought of the recipe.
Look, and see the Earth through her eyes.
Mark Valencia – Editor SSM