This article was revised on 05 Feb 2017. Biltong is a South African type of dried/dehydrated meat introduced/founded by the early Dutch settlers. The name is derived from two words “bil” – meaning buttock (the buttock, rear, or rump of the beast) and “tong” – meaning strip (the cut of meat in strips). The purpose for the early settlers developing biltong was the need to preserve meat (game) in an often harsh environment without refrigeration.
Not Jerky
Biltong is similar to jerky in the fact that both are dried; however, this is where the similarity ends as the two products are worlds apart in taste and make.
Personally, I do love jerky and until biltong came along I didn’t know any better, but I now have to say biltong is a much superior tasting dried meat than jerky. So much so, I hardly ever make jerky any more because my family and I would rather biltong to jerky any day.
By the way, since originally writing this article I have personally improved my biltong making skills and I have reflected this by regularly updating this post. There’s always room for improvement, but I’m happy with my consistently good results so keep reading to find out how it’s done!
My Introduction to Biltong
I was first introduced to biltong by my Brother In-law, Werner, whilst I was visiting him and my sister over in South Africa. I had noticed the little vans situated at the airport (much like hot-dog stands) selling this strangely named hung meat, but I had no idea what it really was until Werner offered me some later. He produced this innocuous brown paper bag that could have been holding potato chips or lollies and I peeked inside and saw thin slithers of shaved brown meat 2-3 inches long, which were slightly pink towards the middle {you could say it resembled thin shavings of roast beef about an inch wide}.
I’d eaten lots of different foods in my travels and I had never seen shaved meat in a bag before, so, I reached in took a small handful of biltong and that’s where my love for this delightful dried meat began. It’s fair to say, biltong is not the most aesthetically looking food but, wow, it does taste good.
Smell and Taste
The smell and taste of traditional biltong is unsurprising given the ingredients. Biltong has a strong coriander aroma and a peppery taste (a little like peppered steak); also, it has a leathery exterior softening slightly in the middle giving it an interesting texture to chew.
In South Africa, biltong is sold everywhere and is eaten by most people as a snack (like chips or lollies) and it makes a particularly good pub, BBQ, or party food and complements an iced cold beer exceptionally well. Biltong is stored whole like a mummified steak and then it’s cut on demand using a special biltong slicer that shaves the whole portion down in seconds.

Biltong in Oz
In Australia, biltong is a little difficult to get; nevertheless, if you look hard enough it can be found at selected delicatessens or purchased online from various retailers. The problem with buying biltong in Australia is the horrendous cost of the product at anywhere between $40 – $60 per kilogram (2 pounds) it isn’t cheap. I guess the high cost of biltong in Australia is due to the novelty and the effort required to make and sell the product in quantities that allow for a fair monetary return.
Edit: As you can see from the recent image above, biltong is becoming more popular in Australia – and getting more expensive!
Easy to make
But here’s the good news – biltong is dead-set easy to make, and in the rest of this article I can show you how to make biltong for under $14 per kilogram! Actually, if you have never made jerky before but were considering it, give biltong a go first because it is easier, faster, and less messy to make.
Equipment Required for Homemade Biltong

In South Africa, biltong is so popular there are products dedicated specifically to making it, such as biltong drying boxes (for home-made), biltong drying rooms (for commercial use), biltong slicers, etc. But honestly, all that is really required to make great biltong is shown below.
Basically,
-
a knife,
-
bowl,
-
food processor or blender,
-
large tray or the clean side bench of a stainless kitchen sink, and
-
dehydrator – I purchased my Excalibur 9-tray dehydrator on eBay Australia here, or USA readers can get them here (but any dehydrator will do, Excalibur has a good reputation).
Out of the above list, the most important piece of equipment is the dehydrator – the Excalibur dehydrator (or some sort of reliable drying device like a drying box). Historically, the Boers (Dutch Settlers) dried biltong naturally over several days by hanging the meat in the open air but in modern times electric dehydrators are a much better way to do the job as it’s faster and less chance the meat will go bad due to spoiling by poor weather conditions, high humidity, animals, and insects.
Ingredients for Homemade Biltong
The ingredients I use to make biltong are:
-
Rump steak – 2kgs (or about 4 pounds);
-
Whole coriander – ¾ cup;
-
Rock salt – 1 x cup;
-
Cracked pepper – ½ cup (ground but large grains)
-
Apple cider vinegar – 3 x cups
Meat
I just buy the standard rump steak already precut from the butcher and it normally comes cut about 1 x inch thickness give or take a few millimetres – doesn’t matter. Rump steak isn’t an expensive cut of meat and at the moment is between $10 – $13 per kilo (2 pounds).
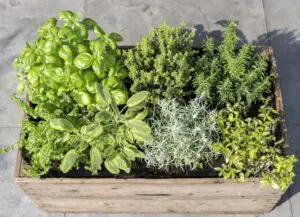
Coriander
I grow and collect the coriander seed myself; however, the shop stuff is fine. Just remember to buy the “whole” seed, not the grounded powder, because there is a huge difference in taste between the two types. By gently roasting the coriander seed in a small pan first, you’ll get maximum taste and aroma from the herb but don’t worry if you forget.
Vinegar
The vinegar, salt and pepper aren’t expensive, and all up with the right price for the meat you can see how $14 per kilo for DIY biltong is not an unreasonable prospect.
Method
As I already stated, making biltong is easy. Below are the simple steps in making your own homemade biltong using an Excalibur dehydrator; however, since this article was written, I have received several comments about using a dehydrator more like a biltong box. That is, instead of drying the meat lying on the food dehydrator trays, I was asked if I could test hanging the meat and dehydrating it at a lower temperature over a longer period – so that’s exactly what I did! And, with great success, I might add.
Therefore, the original steps below have been amended where necessary to include the new dehydration process making biltong the more traditional way by hanging it and drying it over a longer period.
Step 1 – Salting

Trim any excess fat off the steaks (a little fat is ok) and place the rump steaks on the side of a clean sink bench or tray and sprinkle generously with rock salt. Once you have sprinkled the salt on one side, lightly press/pat the salt onto the steaks with your hand (so the salt granules won’t fall off), then turn the steaks over and sprinkle rock salt on the other side. Leave to rest for 1.5 hours, and you will see the salt drawing out the moisture.
I use the side of my kitchen sink as a bench for the salting process because the salt draws out moisture from the meat and this moisture then runs naturally into my sink and down the drain. But, you could also use a large tray placed on a slight lean to let the moisture slowly run away from the meat as it oozes out.
Step 2 – Grinding Coriander Seeds

Whilst you are waiting for the steaks to be salted, place the whole coriander seed in a food processor and grind for a few seconds until the seed has broken up and cracked (you could also roast the seeds before grounding in this time if you wish for added flavour).
Step 3 – Vinegar Bath

Pour the apple cider vinegar into a large bowl and after 1.5 hours, pick up each steak and, using a knife, scrape off as much of the rock salt as possible (it has done its job). Then, depending on the size of the steaks, place them one by one (or two at a time) into the vinegar and submerge them for between 2 to 4 minutes. The vinegar bath helps with the curing process.
Step 4 – Sprinkle With Spices
After the cider vinegar bath, sprinkle each steak generously with cracked pepper and coriander, pat down and then turn the steaks over and repeat the cracked pepper and coriander covering the surface of the steaks.

Step 5 – Place Meat in Dehydrator (this step has been amended also to show the hanging method)
Placing the meat in the dehydrator can now be done in two different ways:
- Meat lying flat on the trays, or
- Meat hanging in the dehydrator.
Personally, I have found the hanging method (shown later in this article) is superior to lying the meat flat on the dehydrator trays. I think the reason the hanging method is better is because of the air circulation, the lower air temperature, and the longer drying time that allows the biltong to cure for a more authentic flavour and texture.

Excalibur Food Dehydrator with meat lying flat (image above)
 Meat Lying on tray method

Place the spice-covered steaks on the dehydrator trays (just like the above image) ensuring there is plenty of room between each piece of meat, and definitely do not let them touch as this restricts the drying process.
Remove any empty trays from the dehydrator and put them aside. Put the trays of meat into the Dehydrator evenly spaced with the temperature dial on “full” (155 F or 68 C°) and the timer on 12 hours.
Meat Hanging method (on low temperature)
As I have already stated, in my opinion, this is the best method of dehydrating the meat to make biltong. To hang the meat, you’ll need to buy or make hooks (I make mine out of heavy gauge wire) and then remove all the trays from the dehydrator leaving just the top tray.
Push the hook through the top of the meat and then simply hang it from the top tray, ensuring no pieces touch each other or the bottom of the dehydrator. It’s also a good idea to put something on the bottom of the dehydrator like a tray or cling wrap to catch the drips from the hanging meat – this just makes the clean-up easier after.
Hanging the meat (image below)

Set the temperature to between 35 – 40 degrees C (image below)

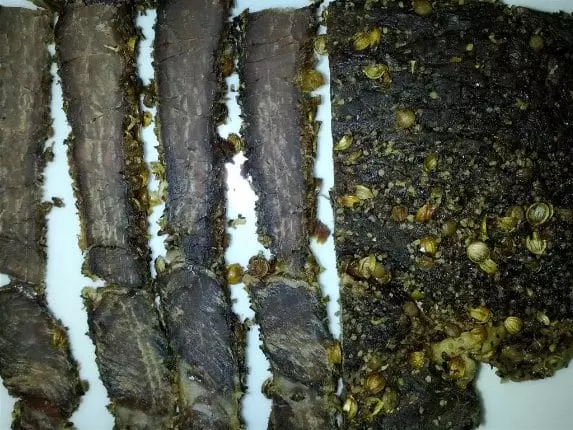
After about 26 hours, the biltong should be ready, but it may take longer depending on temperature variation and dehydrator specifications. Biltong finished drying in Excalibur food dehydrator (image below)

Blitong can be made to your preference and is perfectly fine eaten pink as the image shows below. Many people prefer their biltong a little on the pink side, but I like it pink or grey. These days, I like my biltong exactly the same as the image below.

Step 6 – Test Biltong
If using the high-temperature method and lying the biltong down flat on the trays, you can test after about 12 hours. Alternatively, if you’re using the hanging method at low temperature then start checking after about 24 hours. To check if the biltong is ready, remove one of the steaks and cut through the thickest part with a sharp knife. Traditionally, the biltong should be ever so slightly pink on the inside middle and, as such, have a little “give” when squeezed; however, some prefer their biltong to be grey right through and dry – it’s up to you to experiment for your particular taste.
If the biltong “bleeds” when cut or is too pink for your liking, then just give the drying process two more hours and keep checking until it’s done. If you do accidentally over-dry the biltong, don’t be too disappointed as it will still taste rather good, albeit a little tough to chew and slice.
Final Step 7 – Storage
Our biltong doesn’t last too long before it has all been eaten but just like the early settlers expected, biltong stores very well. I wrap mine individually in wax paper (or sometimes paper towel) and then store them in air-tight containers in the pantry. Biltong should last several months stored this way, depending on humidity levels and fluctuating temperatures in your area. If the humidity is high, then place the container in the fridge to prevent spoiling.

Place Biltong on Wax Paper

Wrap Nicely

Biltong Stored in Container in Pantry (or fridge)
Serving
To serve you’ll need to slice up the biltong first and this can be done by various methods but the main three are:
-
Electronic Meat Slicer – If you do happen to have a meat slicer, you can easily slice the biltong to your liking. You could also purchase a special biltong slicer – they do sell actually sell them.
-
Knife – A large kitchen knife used with care can slice the biltong across the grain in thin fingers to make an easy-to-grab party snack.
-
Kitchen Shears – Cutting the biltong with kitchen shears/scissors can be a faster and more convenient way than using a knife, depending on the thickness and dryness of the biltong.

Notes:
-
The longer you leave the salt on the meat, the saltier it will become. For a less salty taste, reduce the salting time.
-
Remove salt by scraping off do not wash the salt off with water as this will ruin the meat curing process.
-
You can vary the flavour by slightly changing or adding ingredients after Step 3 (the vinegar bath). Try chilli flakes or ground ginger.
-
You can use any dehydrator as per its operating instructions.
-
It is recommended to trim as much of the fat from the meat as possible before the curing process as the fat can inhibit the storage qualities of the biltong. However, some people (including me) prefer to leave a little fat on the meat for taste, knowing the biltong won’t keep as long as it would have with the fat trimmed.
Conclusion
There you have it – homemade biltong using a dehydrator. Not only is making biltong easy, but it’s also a healthier snack to eat than many other processed foods; it’s high in iron; makes an ideal food for outdoor activities (like camping); great for kid’s school lunches; doesn’t need refrigeration; stores well for long periods; can be used in cooking, and for $14 or less per kilogram making your own biltong is going to save you buckets of cash compared to buying it.
These days my Sister and Brother In-law live in Australia, and I now have the honour of presenting my homemade biltong to Werner whenever we visit each other. Thankfully, I can report that Werner claims my homemade biltong is as good as his homeland-made variety and you can’t get any better wrap than that from a true biltong expert. Enjoy!
Buy dehydrator:
Feel free to use the comment section below and have your say (no email is required).
Thanks for reading, and thanks for your support,
Look, and see the Earth through her eyes
Mark Valencia – Editor SSM