It's about time I wrote something on landscaping as it is the base of all gardens for crying out loud. And, without a good landscaping plan (even if it means just using the natural landscape itself) all the best intentions won't enable a garden to reach its full potential – no matter how hard we work on planting and growing.
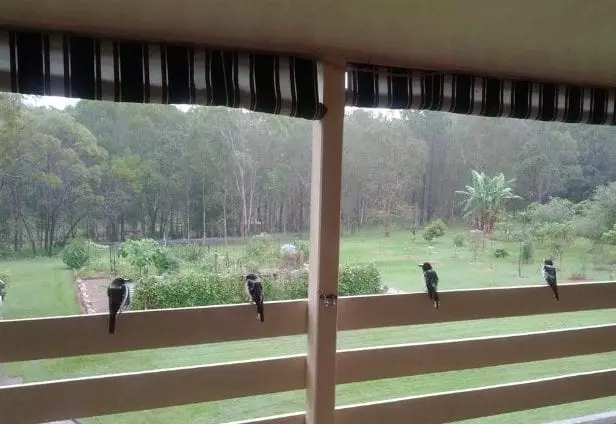
Even the Butcher birds have had enough rain so they're sheltering on the deck overlooking the vegetable garden
In this article I want to cover my gardening landscaping experience with respect to areas with a high annual rainfall. I'm specifically going to cover the paths and borders of a vegetable garden situated in a high rainfall area (building raised vegetable beds on clay or heavy soil can be another post at a later time).
When I built my latest vegetable patch/area, I initially got the garden design almost exactly how I wanted except for one small oversight – the parts around the vegetable patch where I don't grow anything – the paths, borders, and access areas. In my haste and excitement to build the veggie garden and get things growing, I concentrated mainly on creating the garden beds including: positioning, spacing between beds, ensuring height was appropriate, size and reach into the middle was considered, materials used for the frames and borders, possible future expansion room, soils and organic fertilisers, crop rotation, and I even considered the sun positioning in the skyline through winter. However, I never considered how my daily trips back, forth, and around the vegetable garden could make the surrounds of my “master-patch” become such a muddy and sloppy bog through the summer rains. No excuses, but being in drought when we first moved here didn't help give me any hints about how rain may affect my garden area either and it really wasn't until the drought broke that I realised how much water would be falling on, and running through, my property.
Having lawn initially surround the vegetable garden and raised beds certainly did “soften” the  garden area and it looked good too providing I kept the grass mowed and trimmed from around the edges of the raised beds. But over time, I started finding the grass trimming a chore and once the lawn got soaked over a few days of rain, trundling off to the patch to grab some salad for dinner turned into a squelchy, uninviting, swampy, trek. Add to this, the grass growing like mad between the beds and soon the raised vegetable gardens started to look more like veggie boats floating amongst the reeds in a lagoon.
Winter would come, and here in the subtropics the rains would become less frequent and the areas around my vegetable garden would dry out pretty quickly so my memories of the slop and gumboots would fade into the beautiful mild sunny days of winter and spring. The uncomfortable boggy mess around the garden would be forgotten until the rains hit again; then, I would curse myself and wonder why I didn't do something about it when it was dry enough to work!
Finally, after several years of this stupidity I decided (a few winters ago) to bog proof the paths and surrounds of my vegetable garden. And every day since, and especially with record rainfalls over the past few years, I have rejoiced and congratulated myself for making my gardening easier and a more pleasant experience through the wetter times of the year.
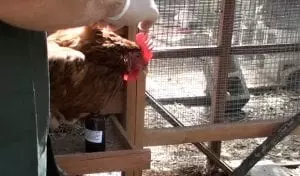
An easily accessible vegetable patch is important

The image above demonstrates the effectiveness of a gravel path – one boot in the "slop" the other on firm ground
If making the trip to the vegetable patch is an uncomfortable chore for us in the rain how can we expect others (especially children) to enjoy doing it. It is one thing to have to wear a raincoat or use an umbrella when going to the vegetable garden but sloshing through mud is definitely not fun and totally unnecessary when the right landscaping plan is implemented.
A poorly accessible vegetable garden gets used less often and defeats the purpose for having one in the first place. The veggie patch should encourage visitors not discourage and be a place for people (particularly children) to safely explore.
To ensure the vegetable garden is easily accessed in all weather most vegetable gardens benefit from having a distinguishable boarder and robust internal path structure.
In high rainfall areas, consideration must be given to water flow, drainage and water run-off for garden paths and borders.  Man made structures can have unintended consequences like diverting water to unwanted areas or stopping water completely and creating a bigger problem.
Many different types of materials can be used for paths and borders and all work well. I decided to use gravel and large granite boulders for my project because it was cheap, easy to source, and fast to build. Also, boulders and gravel let water through and this was an important feature for my garden border and paths as I wanted to slow the water down as it flowed across my property but not trap it and make a water logged mess.
Because my property has a medium downhill slope and slightly from right to left culminating in a re-entrant/catchment area at the bottom, the water naturally flows through the property downhill and in heavy downpours this flow can become quite fast. The boulders around my garden not only hold the gravel paths in place but they also slow the water flow down and prevent the gravel paths (and topsoil) from potentially being eroded away. After the rains though, the water is still able to find its way through the rocks, my vegetable garden, and down the hill rather than sitting in the middle of my yard.
Here's how I did it
Materials used
Below are the main materials I used to bog proof my garden:
-
Borders – Granite boulders sourced directly from the quarry @ $45 per ton this saved me considerable cost as some landscaping retailers charge 3 times this amount.
 I ensured the average rock size was around 30 – 60 cm (25 inches max) so they were heavy but still able to be physically man-handled into position by me.
 -
Gravel – I used 20 mil multi gravel/stone but any stone or drainage gravel could be used of similar size. The smaller pea gravel is not optimal as it washes away easily and tends to
move more under foot plus the fact that it annoyingly gets caught in the tread of boots and shoes, which then gets dragged into the house. Too large, and the gravel path gets difficult to walk on (especially with bare feet) and it gets harder to handle and spread. So, I wouldn't go beyond 40 mil and I certainly recommend 20-25mil gravel. -
Sand – The importance of sand can't be overlooked as this is what helps to drain water through the path as well as keeping the gravel neatly in place. Whether the sand is salt free or not isn't important; however, I used unwashed sand because the salt aids as a weed inhibitor helping to subdue weeds and grasses from developing through the path also plain sand is cheaper than washed.
-
Weed mat – Biodegradable weed matting is environmentally friendly and inexpensive especially if purchased in bulk from the distributor (not from a garden centre) – I got mine from Weed Gunnel http://www.weedgunnel.com.au. Depending on path size and amount required the material can be ordered in several different sizes and lengths. This fabric lets water through whilst preventing grasses or weeds from coming up and after about 4 – 8 years (depending on how it's used) it breaks down.
 I ensured the average rock size was around 30 – 60 cm (25 inches max) so they were heavy but still able to be physically man-handled into position by me.
  move more under foot plus the fact that it annoyingly gets caught in the tread of boots and shoes, which then gets dragged into the house. Too large, and the gravel path gets difficult to walk on (especially with bare feet) and it gets harder to handle and spread. So, I wouldn't go beyond 40 mil and I certainly recommend 20-25mil gravel.
 How much?
-
Granite boulders – Enough to make the border. Most suppliers will sell boulder rock by an average size like, granite boulders 300 – 500mm. Therefore, a person can get an idea of how many boulders they require for a border by dividing the total length by the medium size rock, which is 400mm (in this case) and the quarry operator or landscape supplies should be able to estimate the tonnage.
-
Gravel – Like dirt or any landscaping medium the amount of gravel required is estimated by simple maths in cubes (Width x length x Depth = M³). I found about 6cm (3 inch) deep of gravel worked well; so for example, a path 1 metre wide by 10 metres long covered 6cm deep in gravel would require 1 x 10 x .06 = 0.6 m³ and depending on how the retailer sells the gravel (by the cube or ton) a price can easily be worked out. In this case, 0.6 cube of gravel would roughly be just under a small 4×6 trailer load. In any case, the supplier should measure the correct weight on pick-up or delivery.
-
Sand – Similar to the gravel but I only went a few inches deep of sand.
-
Weed mat – Again, enough to cover the required area allowing for some overlapping and the border rocks to sit on.
Method
Assuming the areas required to be covered have been measured and marked out first and the materials needed available, I have broken this down into stages.
Stage 1 – Lay down the weed matting

Start laying the weed mat on the outer border first, then around the beds, and finally covering the rest
Killing off the grass or lawn first before laying out the weed matting isn't necessary because the amount of material soon to be placed down will surely smother and kill any grass or weeds underneath.
Lay the weed mat out overlapping and ensuring all gaps are covered and if laying around raised beds make the mat rise up the structure a few inches. This will make the mat is push against the raised bed above ground level once the sand is placed on top making a tight seal making it difficult for weeds or grass to push through.
Pin or secure the mat down in position so it doesn't get blown around in the wind.
Stage 2 – Make the border

Laying the boulder rocks on the weed matting to make a border
The boulder rocks should be carefully positioned onto the outer edge of the weed mat. I used a heavy duty fridge trolley to manoeuvre the rocks from the pile to where I needed them. I also had a crowbar handy to lever the bigger rocks into position.
Boulder rocks are very heavy so correct handling is vitally important to reduce the chances of injury especially to the lower back. Levering the rocks onto manual handling equipment (like a trolley) and then wheeling into position is time consuming but much safer than lifting or, rolling by hand, or lifting into a wheel barrow and tipping out.
On the corners of the border is where most of the largest rocks were placed and after that I just made sure I evenly spaced the big and smaller rocks around the border flush against each other point to point.
Stage 3 – Lay the sand

Sand spreading

I used a spade and rake to evenly spread the sand about 4cm (2 inches) deep and I continuously compressed the sand down by walking over and lightly hitting it with the back end of the rake as I went.
Stage 4 – Spread the gravel

Adding another inch more than the sand, spread the gravel on top of the sand compacting along the way. The back of a steel toothed rake held upright (perpendicular) and thumped downwards was a really effective way to even the gravel and settle it into position especially against the boulders or garden beds. The gravel compacts surprisingly well into the sand and feels quite stable under foot. Even when a wide tyred wheel barrow is rolled around on top the gravel stays relatively stable.
Stage 5 – Hose
Finally, all that's required is a quick sprinkle with some water to settle the gravel and sand into place and then another pat down through walking traffic or using the rake again to lightly tap any raised or uneven places.
And, that's all there is to making a wet weather friendly border and path around the vegetable garden.

Conclusion
Not every vegetable garden has water or boggy problems and of course all gardens are different; nevertheless, it still is prudent to consider access to and around the garden as a planning feature to be given as much importance as the actual garden bed design itself.
For those who are lucky to have a climate allowing a working vegetable garden all year ro und, it's a shame not to take full advantage simply because of rain and boggy ground. Frogs (pictured right on a broccoil leaf) love the constant wet weather but I don't…
As the saying goes, build a road and the people will come… I reckon, build a bog proof path system for the vegetable garden and visit it rain, hail, or shine.
Share you vegetable garden story by making a comment below (no email is required).
Thanks for reading and thanks for your support,
Look, and see the Earth through her eyes
Mark Valencia – Editor SSM