The following article is a modified transcript from a video I created on how to grow galangal so if you'd rather watch the video instead of reading scroll down to the bottom of the page.
This is my five top tips on how to grow a ton of galangal for some reason I think of the Bonanza theme every time I grow a galangal or harvest it… I don't know why… am I weird? Let me know in the comment section below!
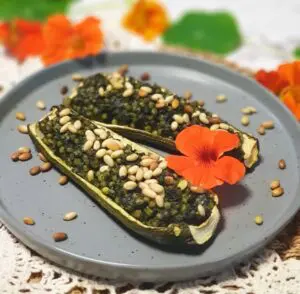
Galangal rhizome with peeled & cut stem on leaf (image above)
Anyway, let's get into it, first of all, what is galangal? Well galangal is one of the world's most used food crops and nobody seems to know about it, well, not many people know about it and if you ask someone in the street "do you know what galangal is?" They probably don't quite know but I bet they've eaten it.

Galangal is a really easy plant to grow and the galangal clump behind me (see image above) is over 2 meters tall! Galangal originates in China and we love growing it in our garden because it's one of the best ornamental food plants we have here on our property.
Galangal is a spice and it's related to ginger you might remember my how to grow a ton of ginger video? Well, ginger and galangal are related but they don't taste at all alike and in fact, they sort of look a bit similar but galangal is a lot more fibrous than ginger.
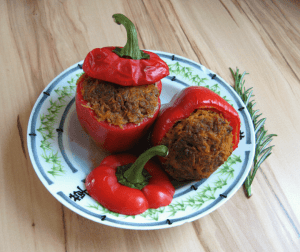
Galangal is typically used to flavour Asian dishes like in stir-fries or soups mainly in Thai, Laos, and Indonesian foods. In fact, it was our trip to Thailand and Laos in 2016 that really inspired me to start growing galangal here at home and by crikey wasn't that a good idea because it just grows like crazy and is excellent in all the foods that we love to eat.
Galangal can be used fresh, dried, and ground into a powder but we often just use it straight like it is chopped nice and fine into a dish and cooked up. It has a distinctly medicinal taste that is quite bitter on its own it's not unpleasant but it really is quite strong and you don't need much of this to flavour a dish. It's fairly pungent, but good, especially good as an accompaniment and an addition to flavour foods and bring that food up it really does bring a dish up you sort of don't know it's in a dish, however, you tend to notice if it's missing (if you know what I mean) so it'll bring up a great Thai or Asian dish from "yeah that's nice to, wow that is really good what's in that!? A hint of galangal that's what…

One thing I forgot to mention in the video (annoyingly) was the galangal flower (image above). It's not a spectacular flower by any means but it's still nice and adds to the appeal overall of this excellent food/ornamental plant.

Tip #1 Position
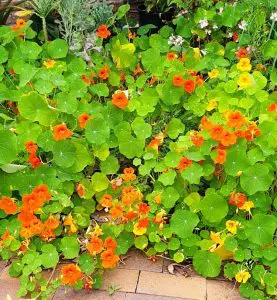
Positioning your galangal in the right spot is vital if you want to get the most out of your crop and to get the best growth out of it galangal is best positioned in full sun. We've got it here right in the middle of our vegetable garden (see image above) you will find some writings on the interwebs that state that you should grow galangal in shade or in part shade I totally disagree with that I reckon you should grow it in the sunniest spot possible if you want it as a huge feature plant like this and to get the most out of it.
But yes of course you can grow it in part shade or even some people say in full shade, I don't think that's optimal, but if you want to give it a go in full shade go for it what you don't want to do is grow it in a spot that it will shade out other plants. Now, I think we've made a bit of an error by planting it in the middle of our patch because it does tend to grow so huge so what I'm thinking of doing is moving this clump digging it up and moving it to back where my banana trees are or somewhere in that vicinity so it can grow and not shade out other smaller vegetable crops.
Tip #2 Planting
Galangal grows best in a warm climate but it will grow in cooler temperate climates or even cold climates if it's grown in a protected and warm position.
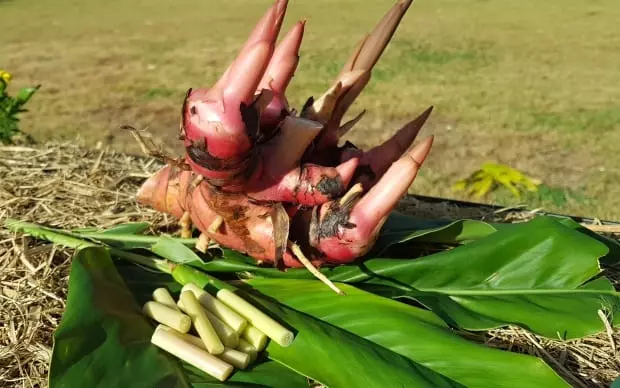
Use crumbly good free-draining soil with lots of organic matter like compost or even wood chip mixed into the topsoil and protect the young plants with a good layer of mulch on top of that at the time of planting. Galangal will grow quite easily from a rhizome (piece of root) like this (see cover image at top) especially if it has one or two shoots already growing to become new plants.
I got our plants initially online but you can try nurseries or even the markets for a piece of galangal root and then just try growing it. I would start the plant off in spring or summer keeping it well watered until it has established and is growing strongly it'll grow quite deep underneath the surface of the soil so a good thick layer of topsoil say about a foot deep is perfect and be prepared for it to grow really fast!
We planted our first crop of galangal in December 2016 so in under two years, it grew from three small plants into this huge ton of galangal pretty amazing hey!? And not that I need to, but you might, galangal does really well in pots just make sure when you plant it in a pot you either harvest it or you re-pot up in six months or so to prevent the plant from getting root bound because of its expansion.

Tip #3 Feeding
Before we talk about feeding let's have a bit of a bonus tip on watering. Galangal will do pretty well in dry weather (it's very hardy) and I love it because of that – so easy to grow, however, it responds a lot better to watering as long as you've got it in free-draining soil give it regular water but don't let it sit in it.
If your soil is fertile it might not need too much feeding for the first 12 months, but again, it will grow better if given some general food plant fertiliser at least once every year. Galangal does grow all year round but it does have its best growth spurts through the springtime and we've just hit spring here now and you can see the extra growth spurts coming through as this is the time of year when it's starting to come into its best growing season.
What I like to do is give it some fertiliser – a little bit of organic blood and bone sprinkled around the base of the plant and into the clump so you get the inside of the plants as well especially in a big clump like we have. But when you do that, make sure you give it a good watering after to prevent that fertiliser from clumping around the stems of the plant in particular and also into the roots so it prevents the stems getting burnt and then retarding the plant growth and doing the opposite effect of what fertiliser should do.

Tip #4 Harvesting
Galangal won't tie back like turmeric or ginger so don't look for die back as a sign for readiness of harvesting rather look for plant growth. I would say at least let your galangal get to a meter high or about 12 months old before you start harvesting and then harvest around the outside of the plant. Sure you can dig the whole thing up and then reassess every year or even plant into a new spot. What we do is harvest around the outside of the plant get some good nice young rhizomes (because they tend to be best in cooking) you can eat them both the older and more rustic are harder and have more fiber so the younger ones tend to be the preferred for us.
Fresh galangal is the best. It's better than the dried or the bottled stuff from the Asian stores but buying it fresh can be expensive at around 30 bucks a kilogram so growing your own is by far the most economical option.
The whole plant can be eaten but it's usually grown for its root by digging it up with a fork or a shovel. Galangal can be actually quite hard to pull up once it's established so be prepared to get your back legs and arms working to get this root out!
Young shoots can be eaten as a vegetable and the stems are also excellent in compost making and are succulent so they're easy to cut up and really go well when you're using them in a compost pile especially with dry carbon type matter that needs to add a little bit of extra moisture.
Tip #5 Pests
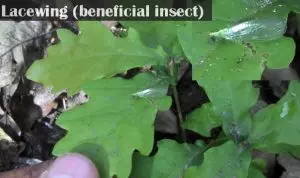
The good news is that you really don't have to worry about it too much… Look, let the grasshoppers and a few caterpillars eat some of your crop because there's plenty to go around and the thing is some of these pests or just about all of them are food for frogs and lizards that love living in this clump of leaves there's moisture there even pockets of water that small frogs can mate and lay tadpoles in, who knows, but they do love it in there and I have to be careful when I'm harvesting to make sure that I don't disturb any young frogs or lizards and if I do I put them back in.
So yeah, don't worry too much about the pests and also accept some imperfections such as rust on leaves and some yellow blemishes or some dieback. If you're worried that you've got a lot of die back or whatever cut it right back and let it grow back out and reshoot and that'll green it up again, of course, giving it a bit of a feed and some extra water can help a lot too rather than getting a fungicide out or spraying the plant with something like that or a pesticide to think that that's going to help – that is the opposite of what you should do!
if you find borers getting into the roots or root rot sets in you could try digging it up and cleaning the rhizomes then replanting them into a new fresh garden bed where it hasn't grown before and this can sometimes give your plants a better environment to grow in and then it can rejuvenate itself. Sometimes the soil in the spot that you've placed it in overtime gets a buildup of these soil-borne pests and diseases and sometimes the best thing you can do is just move them on into a nice new spot and leave that spot there rest for a while so that those pests can die out.
Overall, galangal is a really hardy and easy crop to grow so I don't expect you are going to have too much trouble growing it.
That's it! Those were my five top tips on how to grow a ton of galangal: Position, Planting, Feeding the plants, Harvesting, Pest & Disease. Do all those things right and you'll grow a ton of galangal just like I can.
Video on How to grow Galangal